Appearance
Craft CMS
Deploy a Craft public site using Forge and Envoyer
Created: August 30, 2021 1:12 PM
Create new site in Forge
Check on Zoho Fault if you access to the following passwords:
Forge
Envoyer
GoDaddy
Envoyer Server Management Key
Envoyer Server Management Key 2
Add new site
Navigate to server you want to host the site (speak to a senior if not already determined)
Add new site per details below (aliases optional)
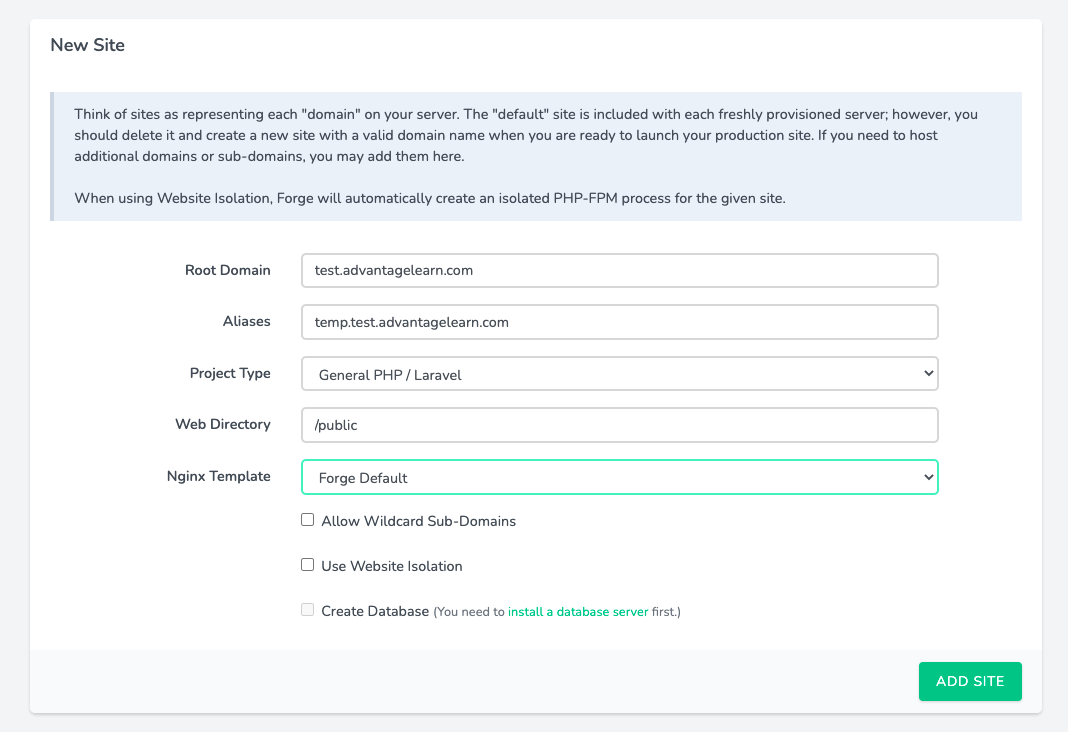
Change Web Directory in Meta section
Click on Meta link in sidebar on left
Change Web Directory to
/current/web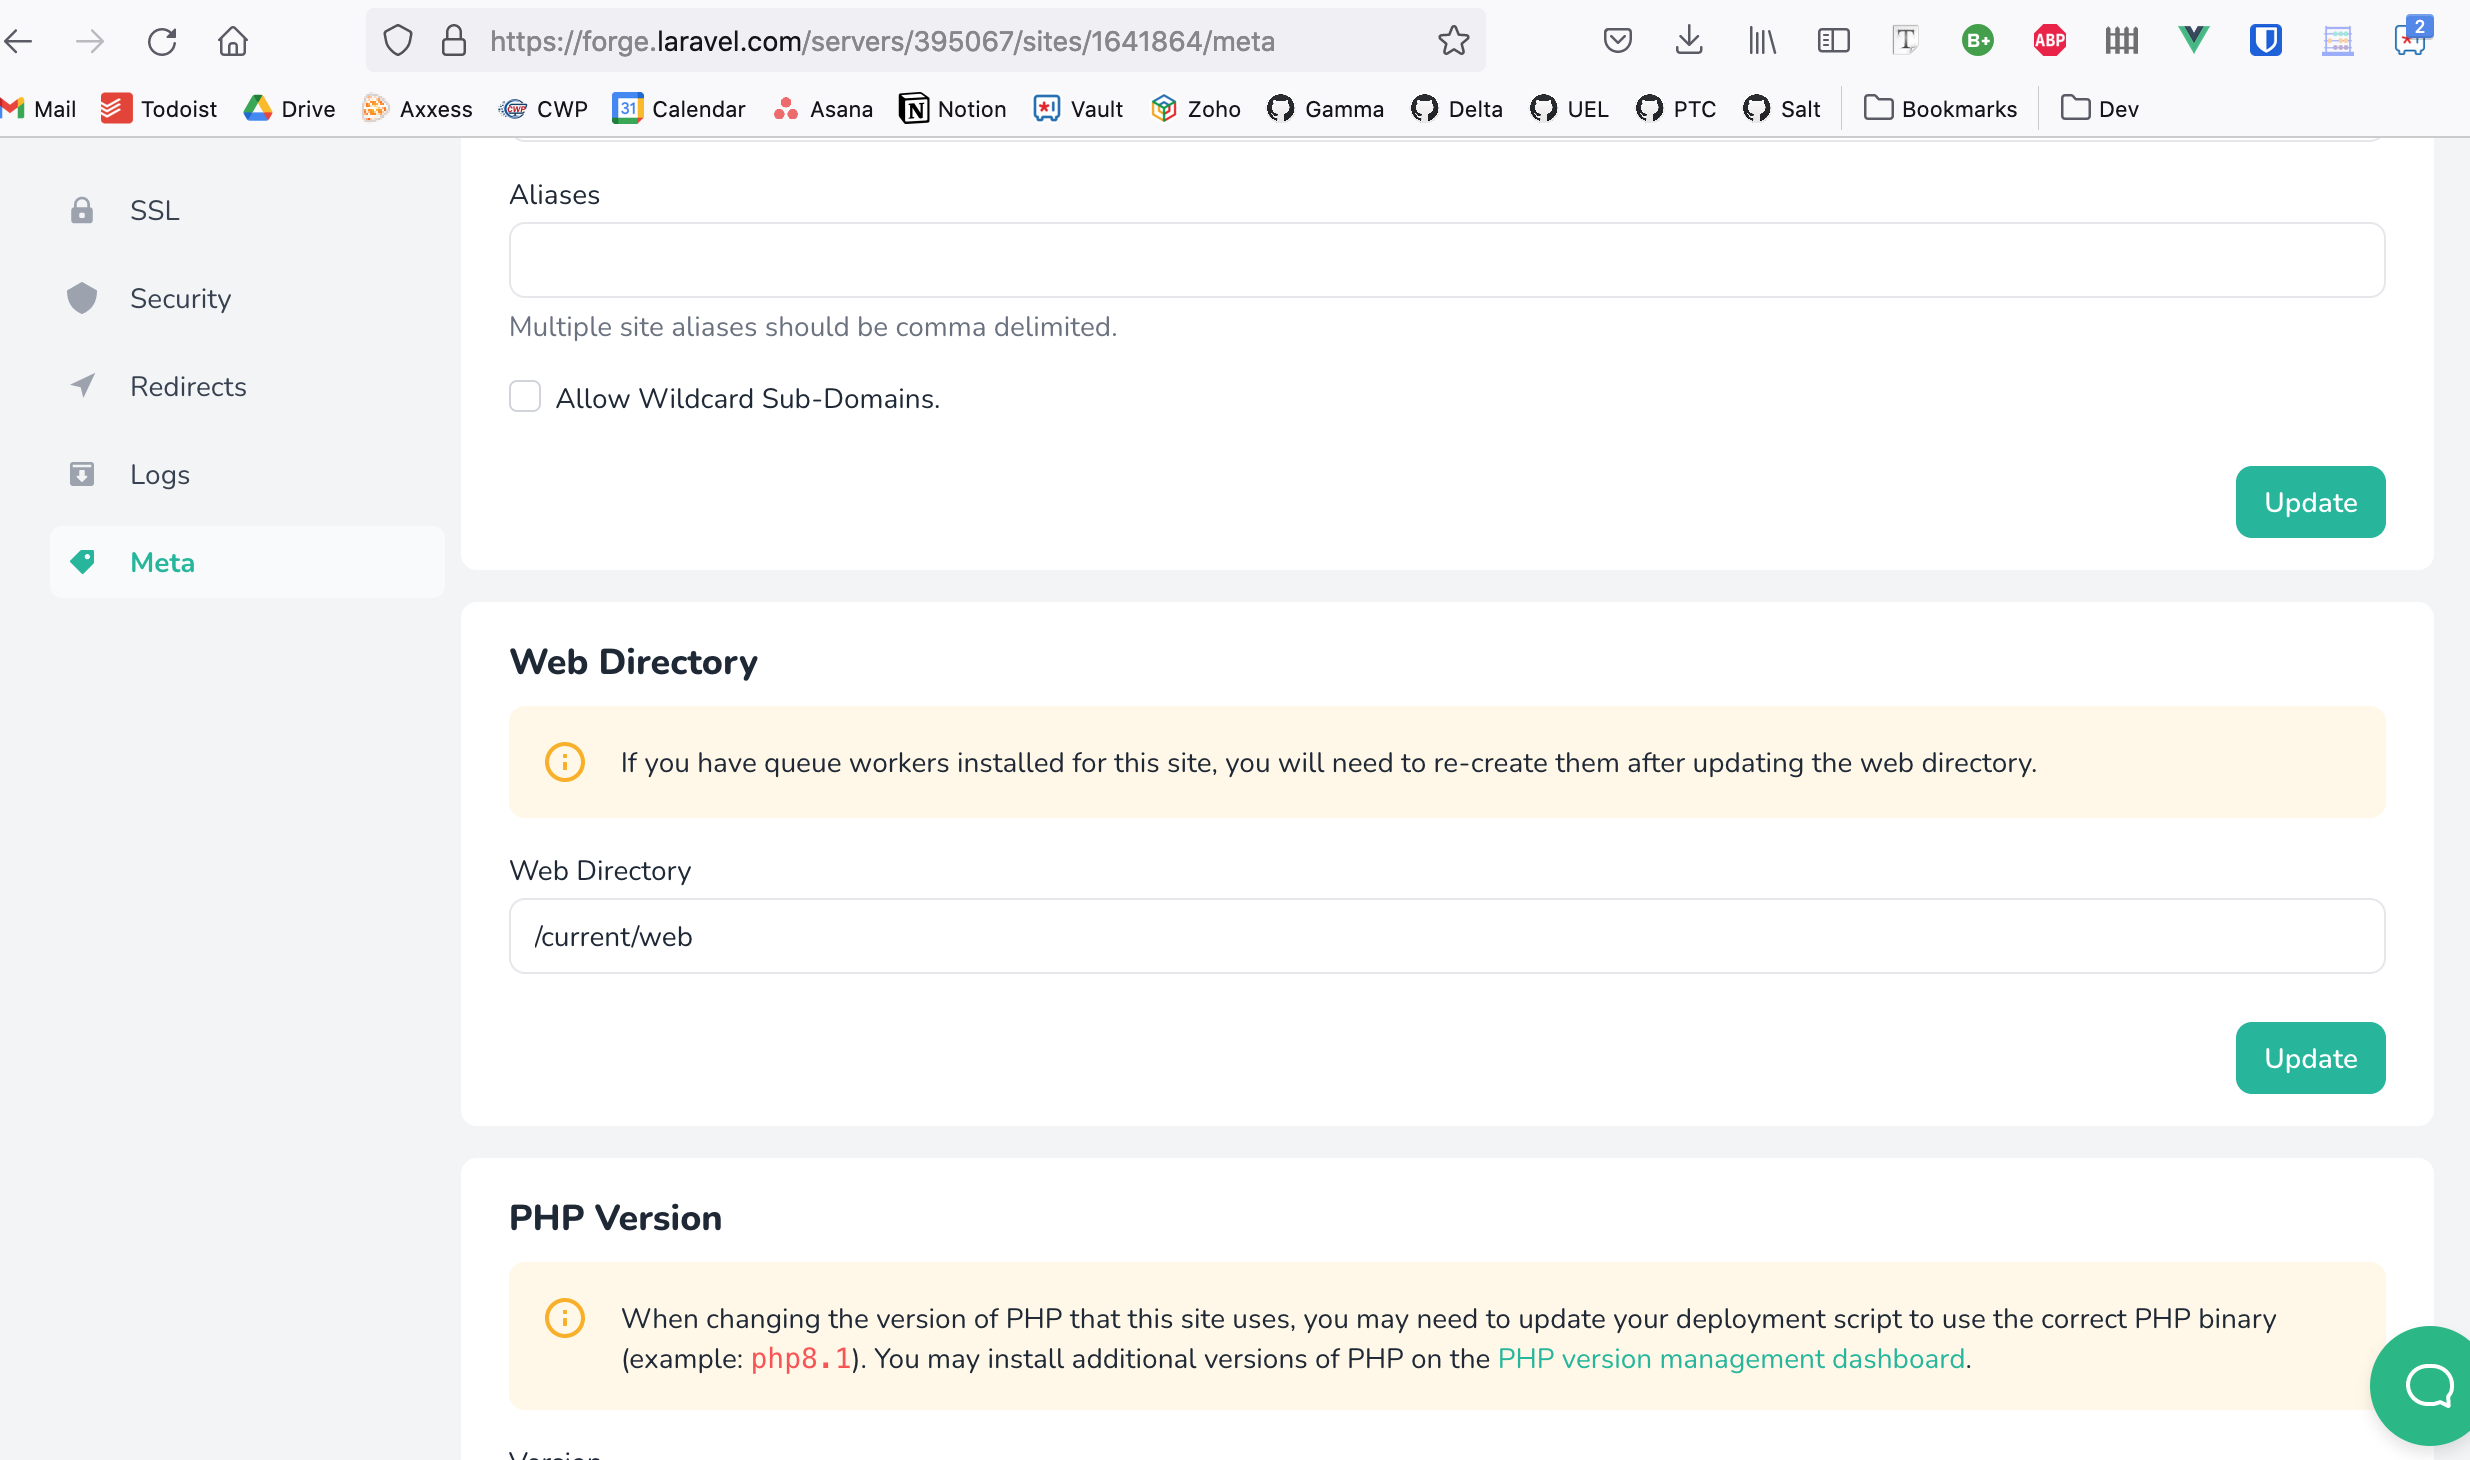
Set up DNS
In Forge find the public IP of the site
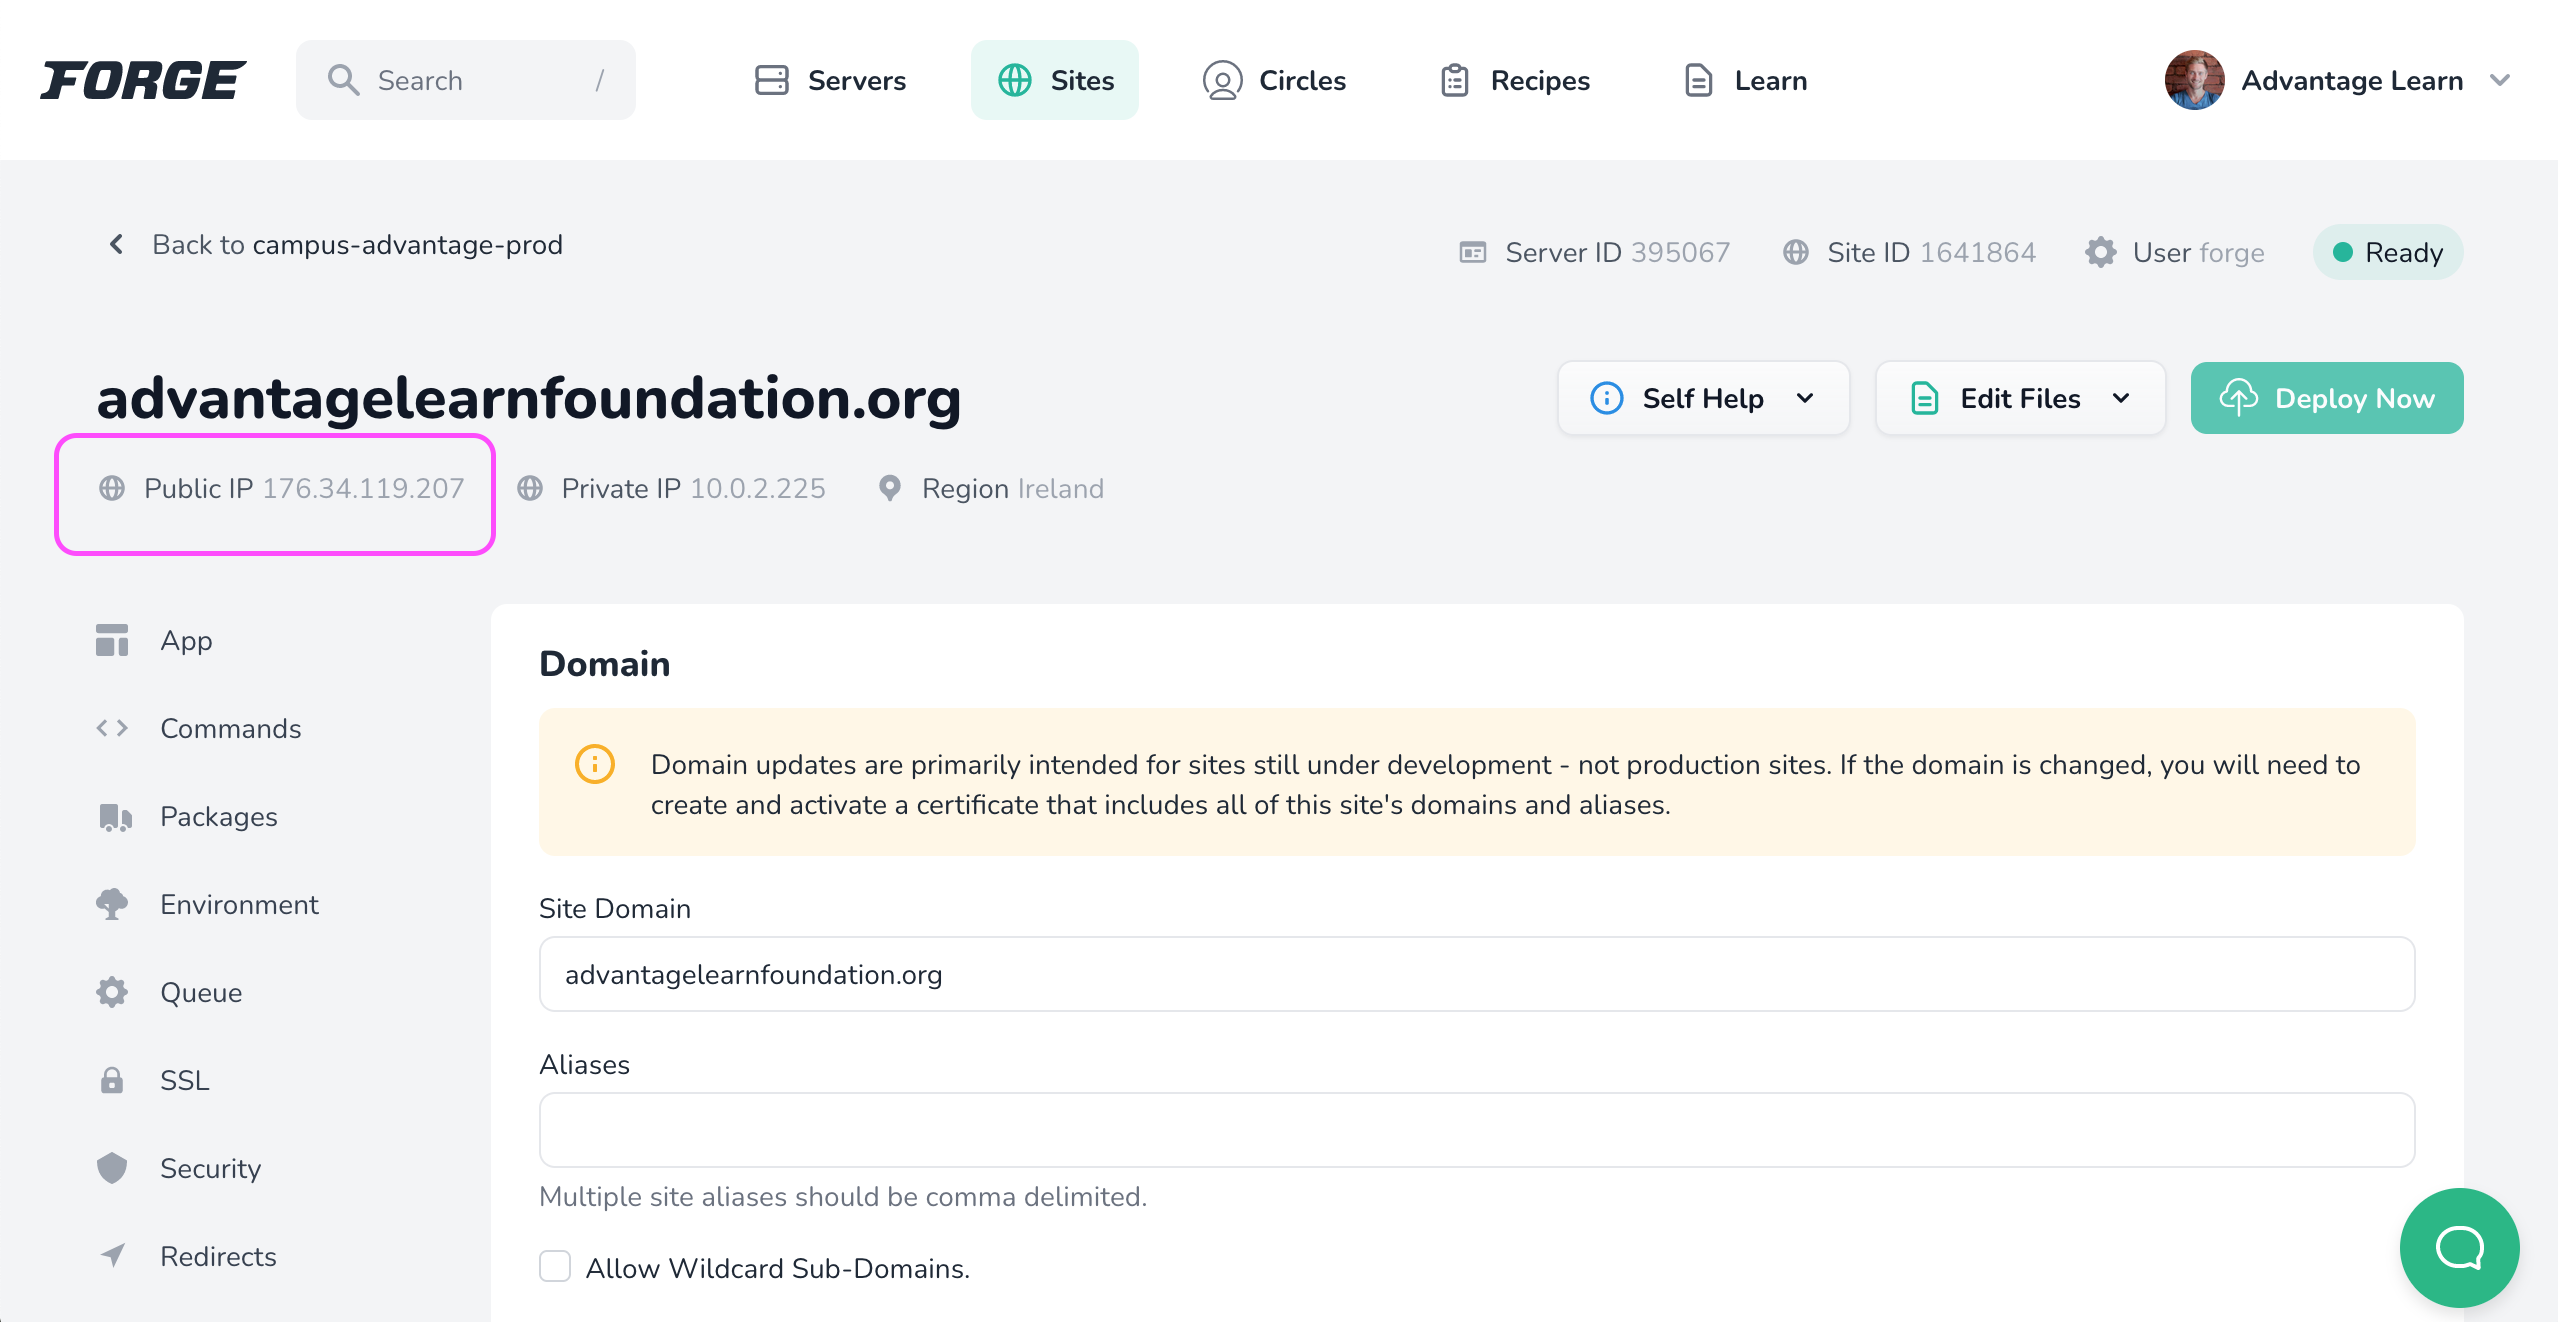
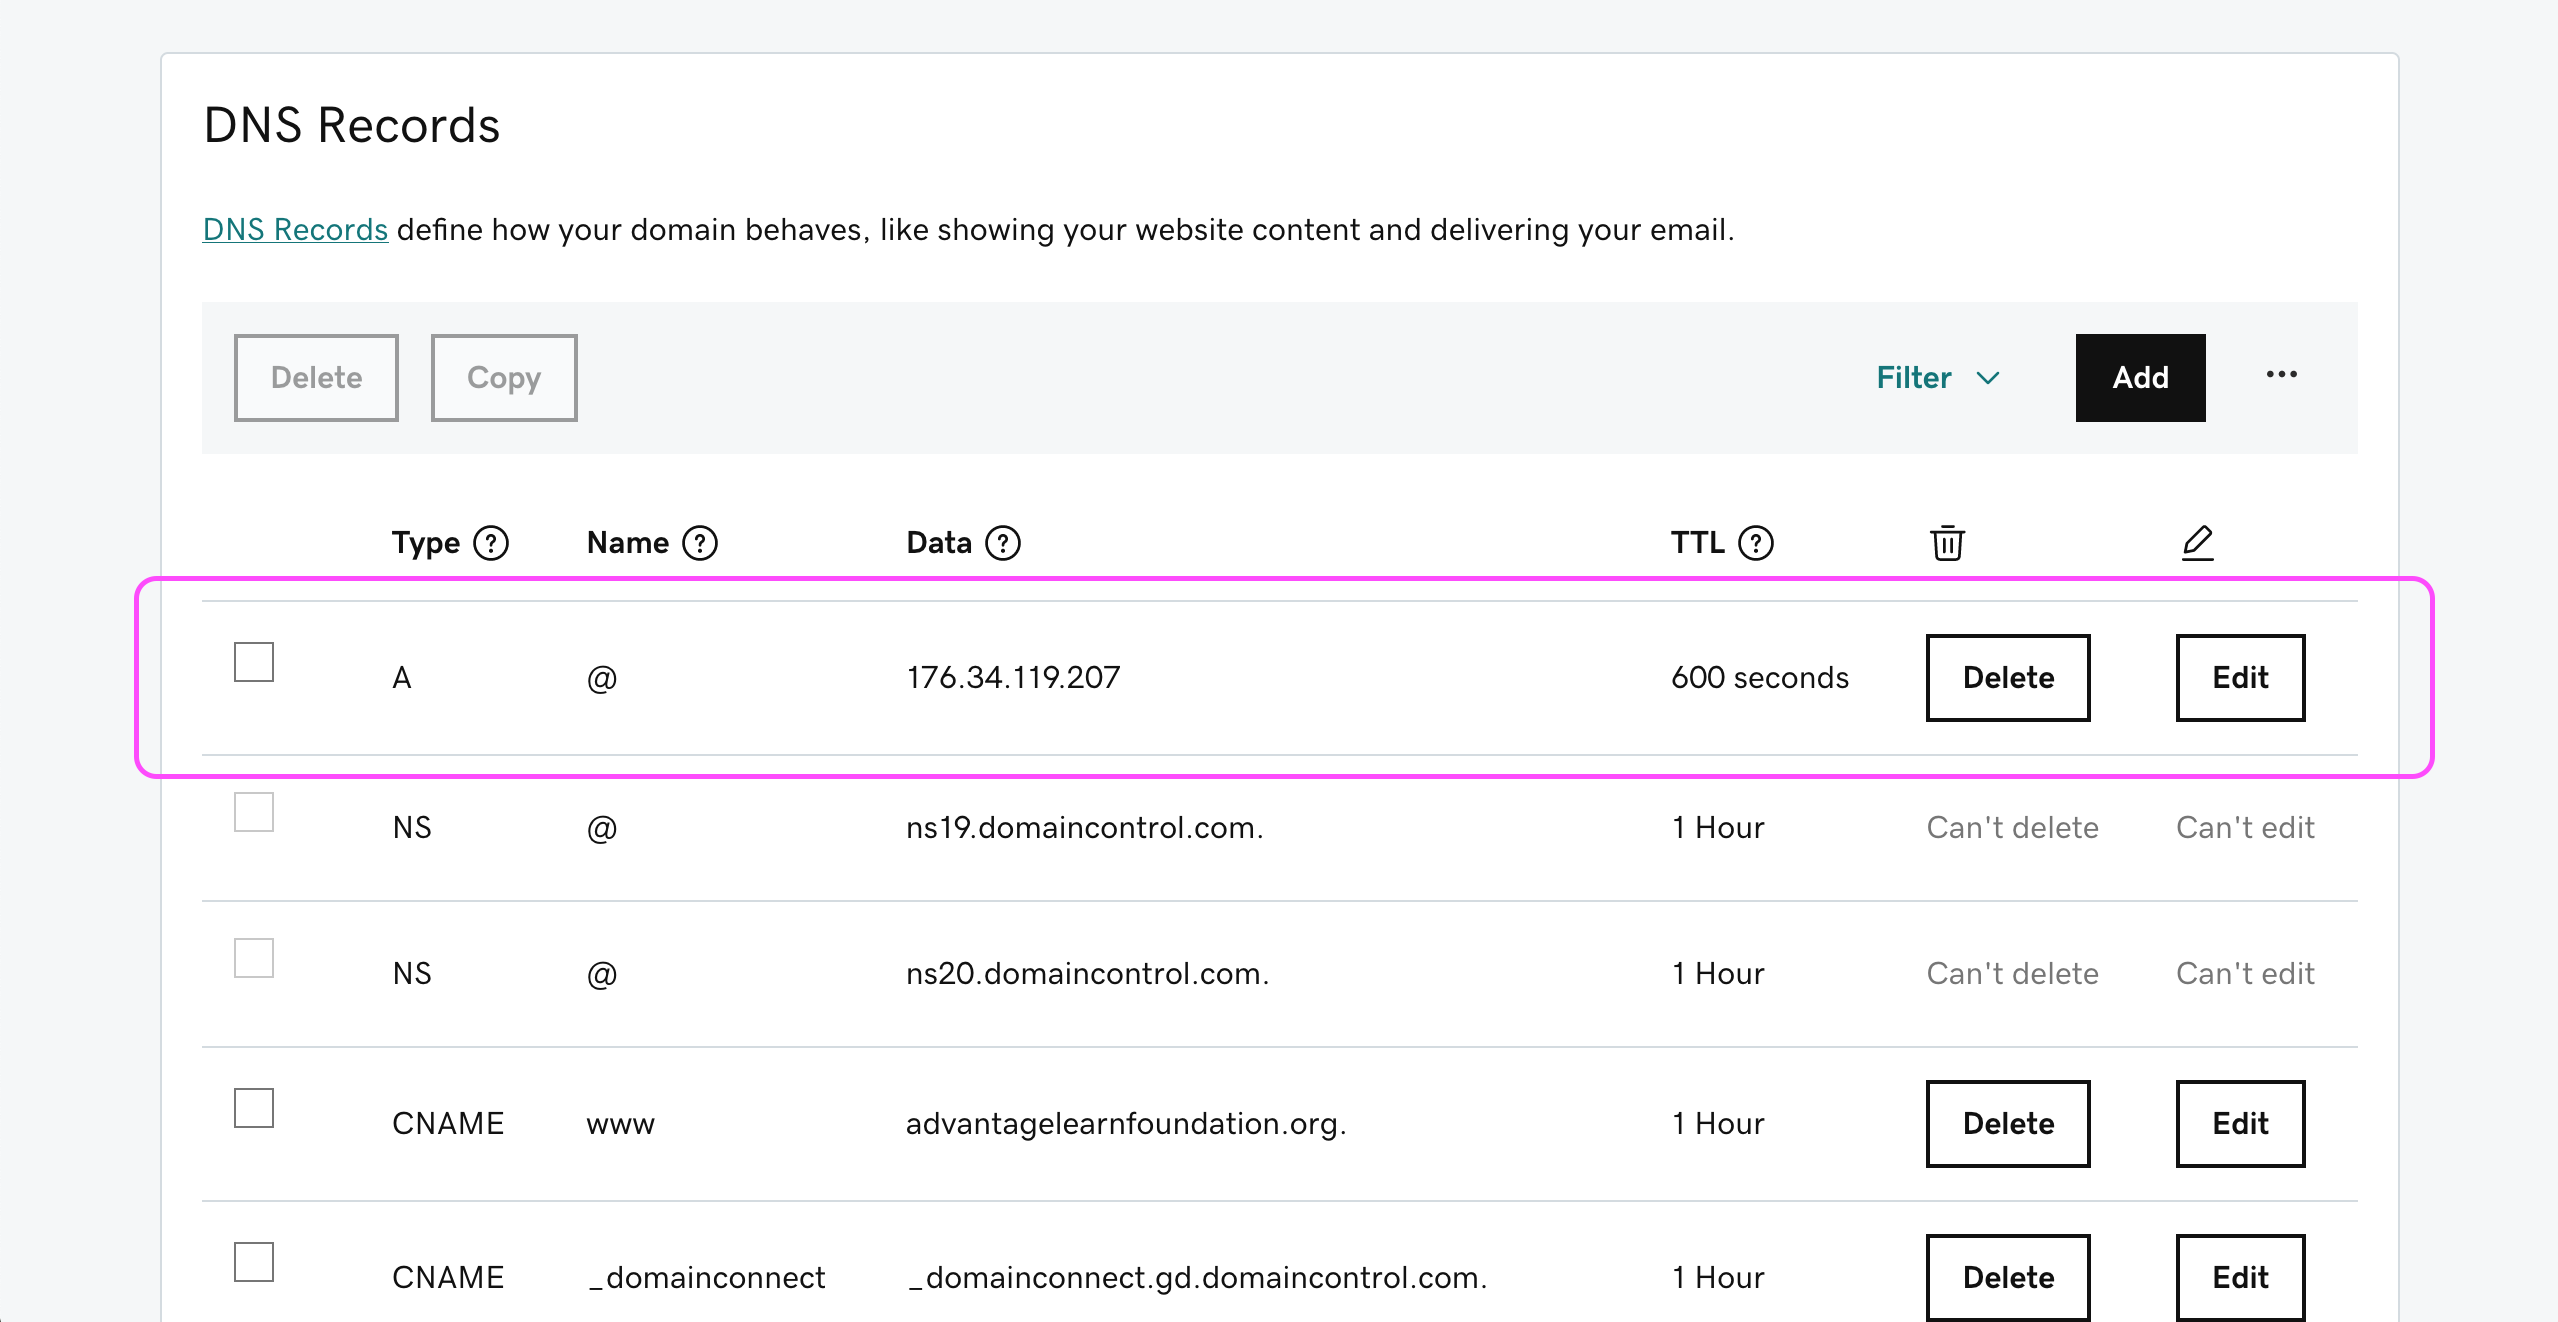
In your domain DNS management tool (Salt uses GoDaddy as at 11/2022) go to the DNS settings of the domain (e.g. GoDaddy admin area - advantagelearnfoundation.org domain DNS settings)
Add an A record with the site public IP address
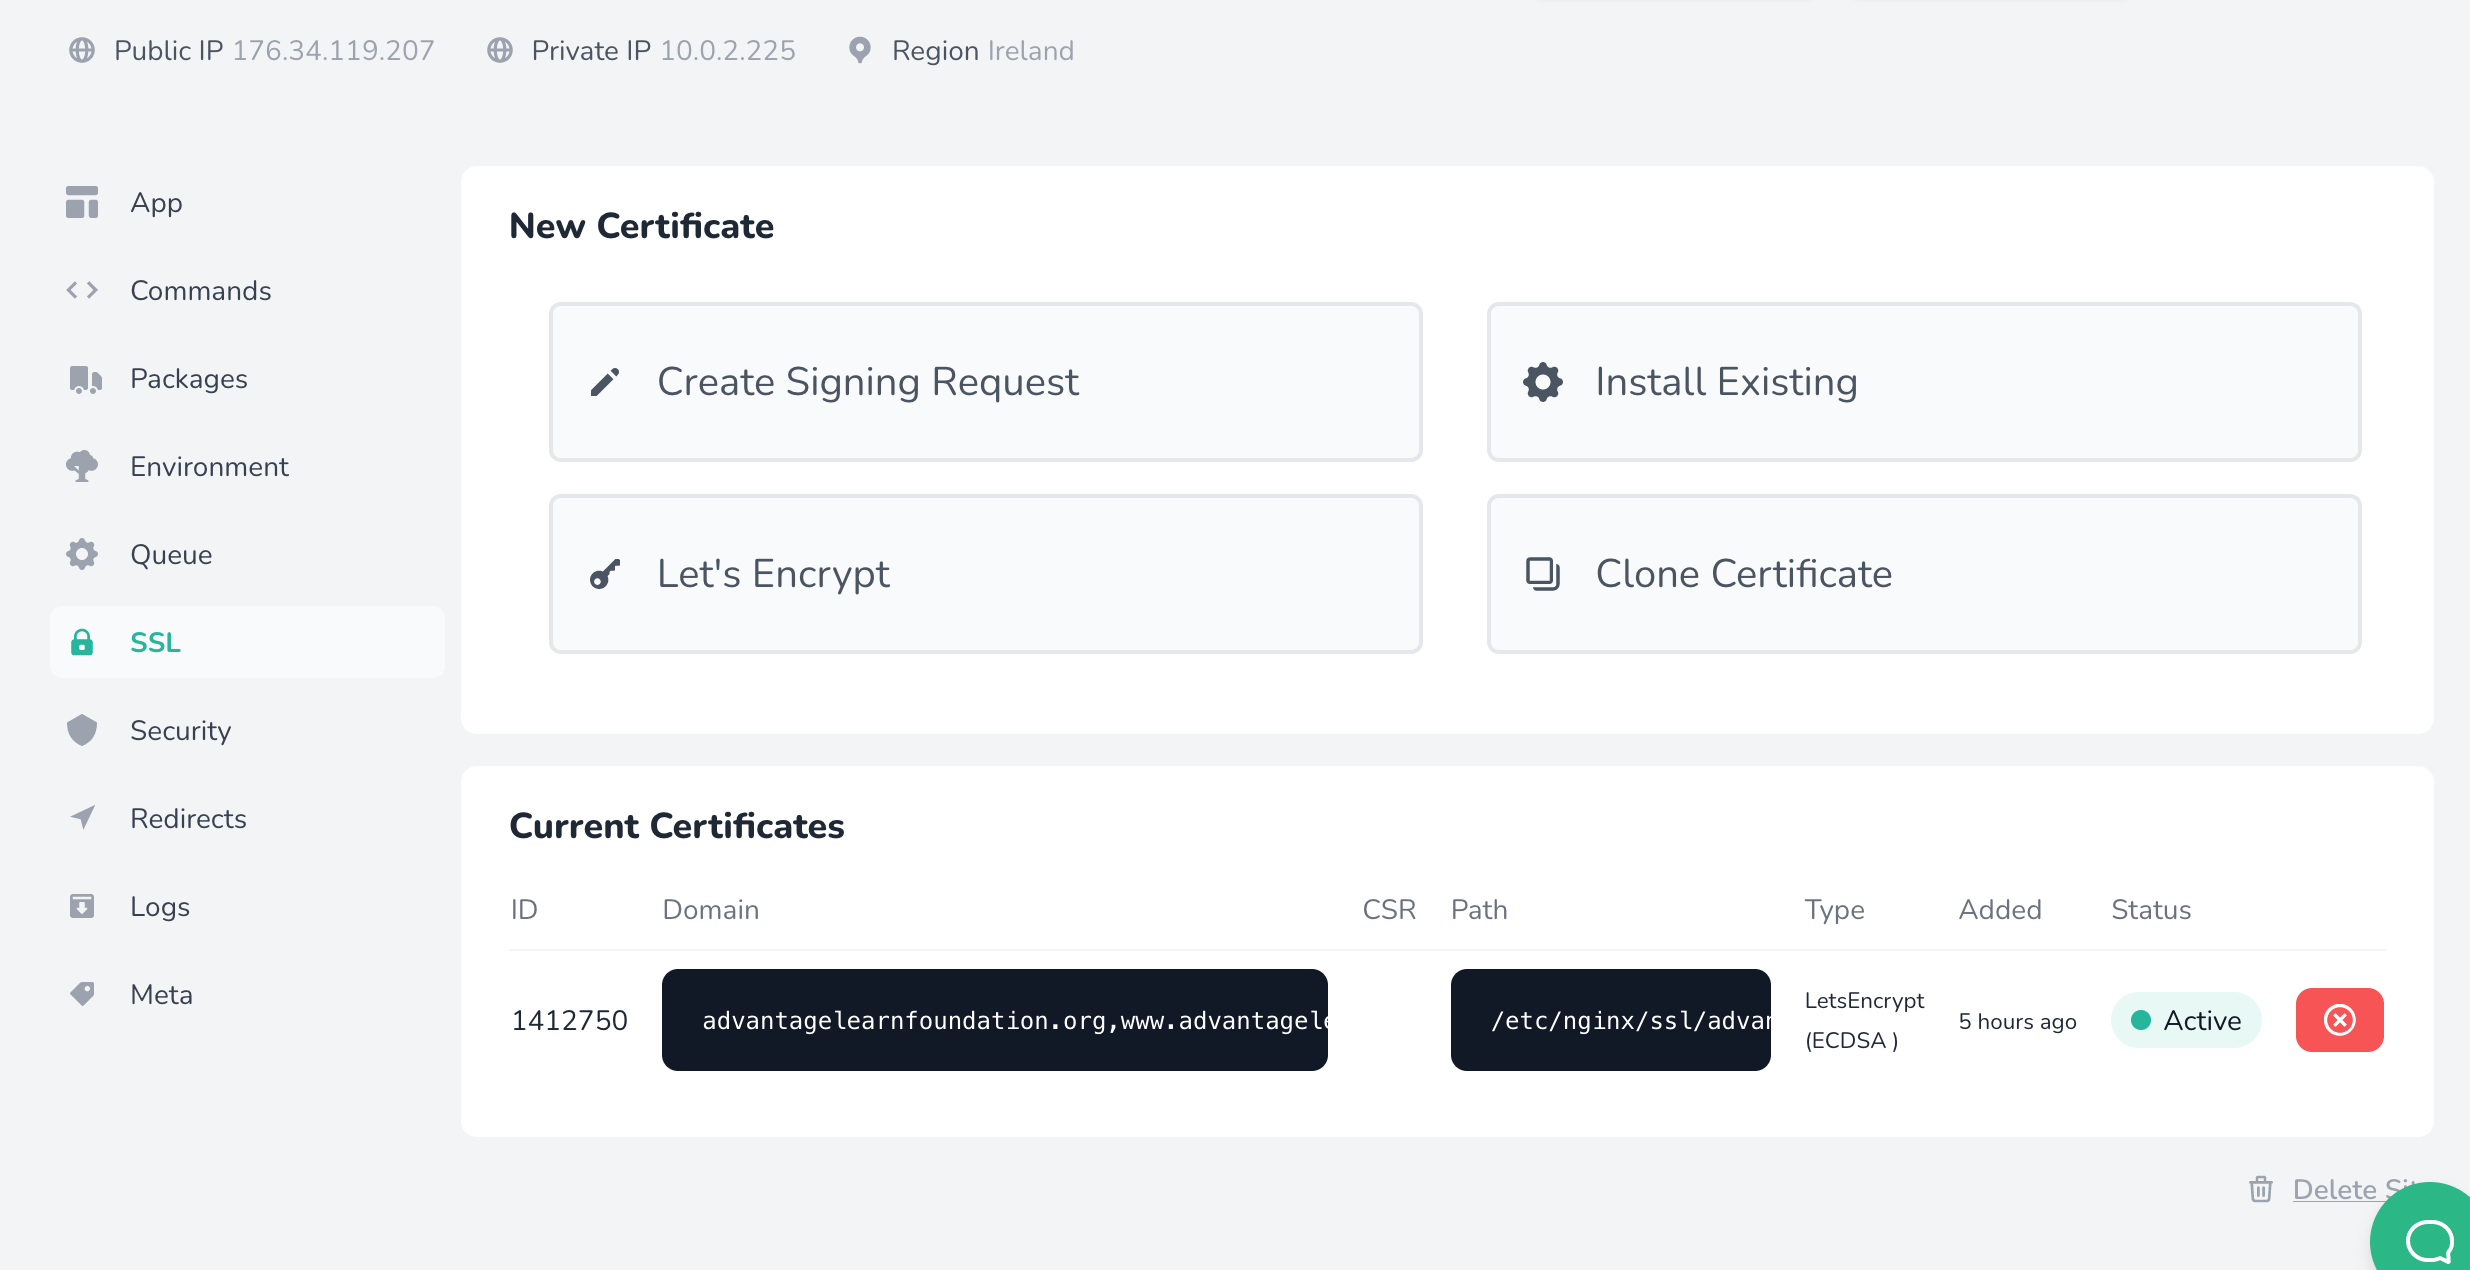
Add let's encrypt SSL certificate
Back to Forge and let's add SSL
Click on the "SSL" menu item and then click 'LetsEncrypt" from the list of certificate options.
The DNS A record must be in place in order for this work
Set up the DB
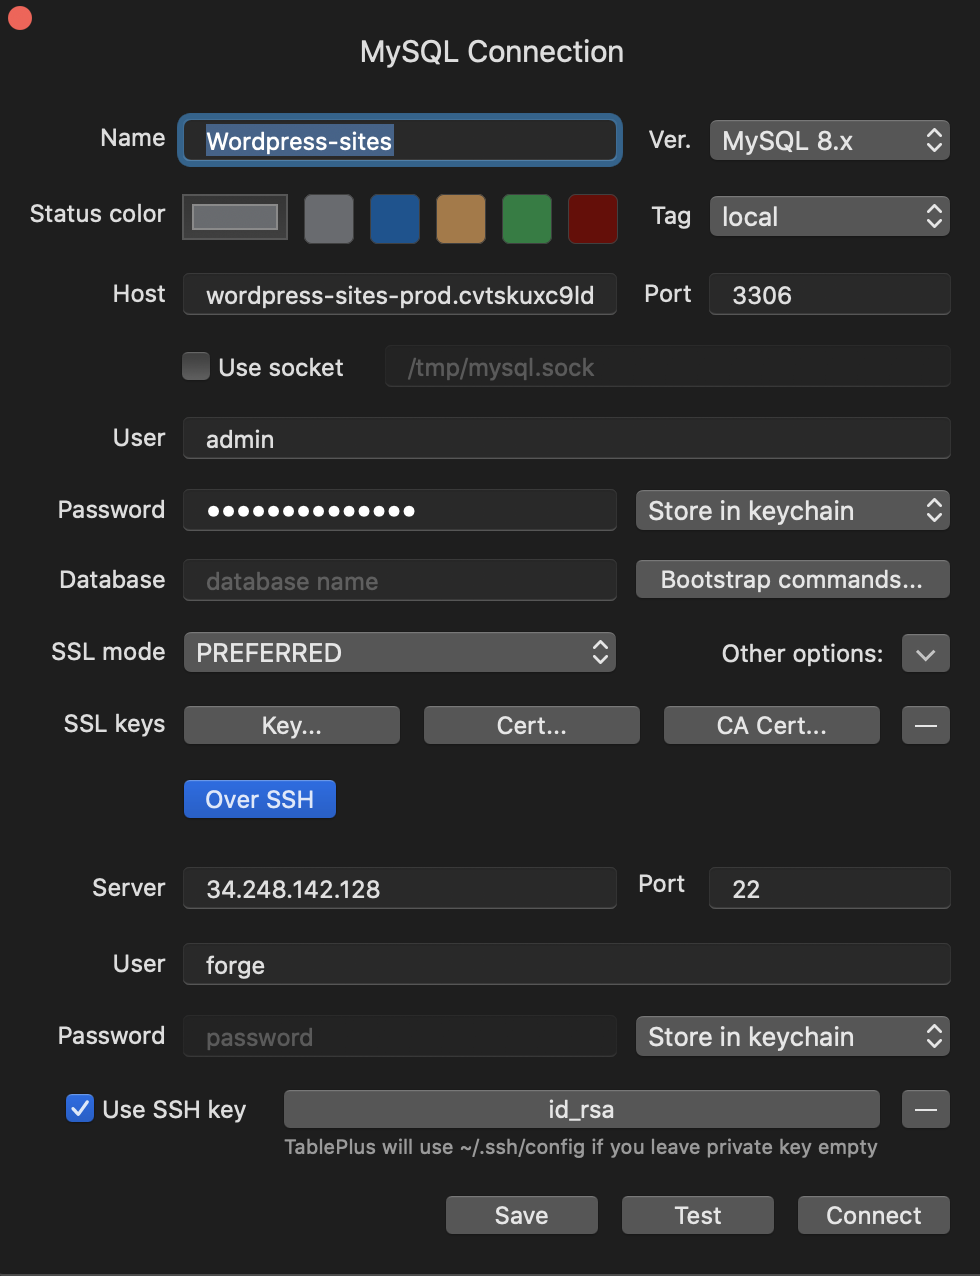
Global connection set up on local
- Create a Table Plus connection to the server (you can get the host, user, password from Envoyer. Find another site on the same server. Navigate to the project on envoyer, then server tab, then manage environment. After putting in the key you will see the DB details used by another site on the server )
Host: e.g. wordpress-sites-prod.cvtskuxc9ldv.eu-west-1.rds.amazonaws.com
Server: e.g. 34.248.142.128
User: e.g. admin
Password: (see vault or details from envoyer)
SSH User: e.g. forge
Tick Use SSH key box and add your private key
Add a new DB
Once connected to the server add a new DB, you will use this on the Craft install.
Set up the deployments in Envoyer
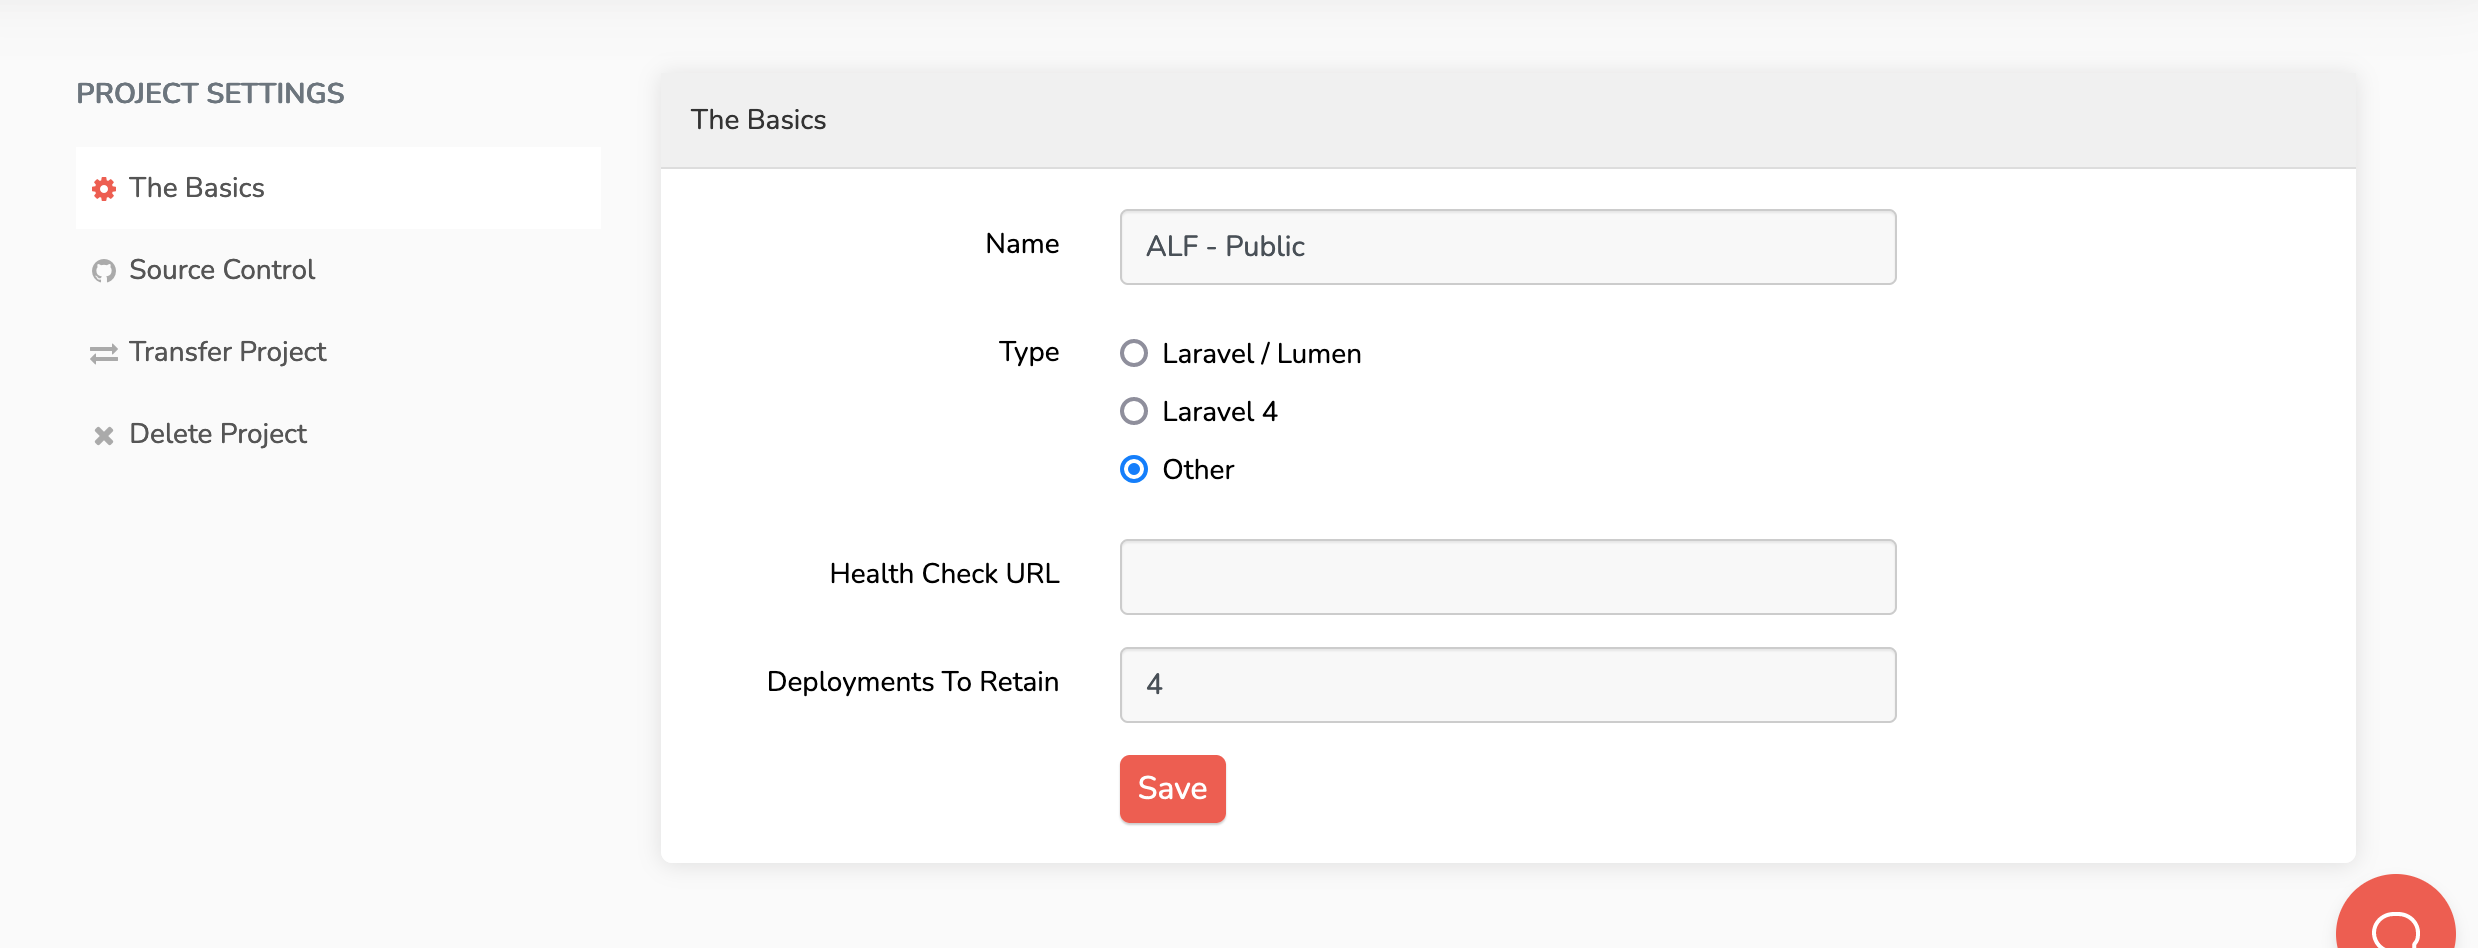
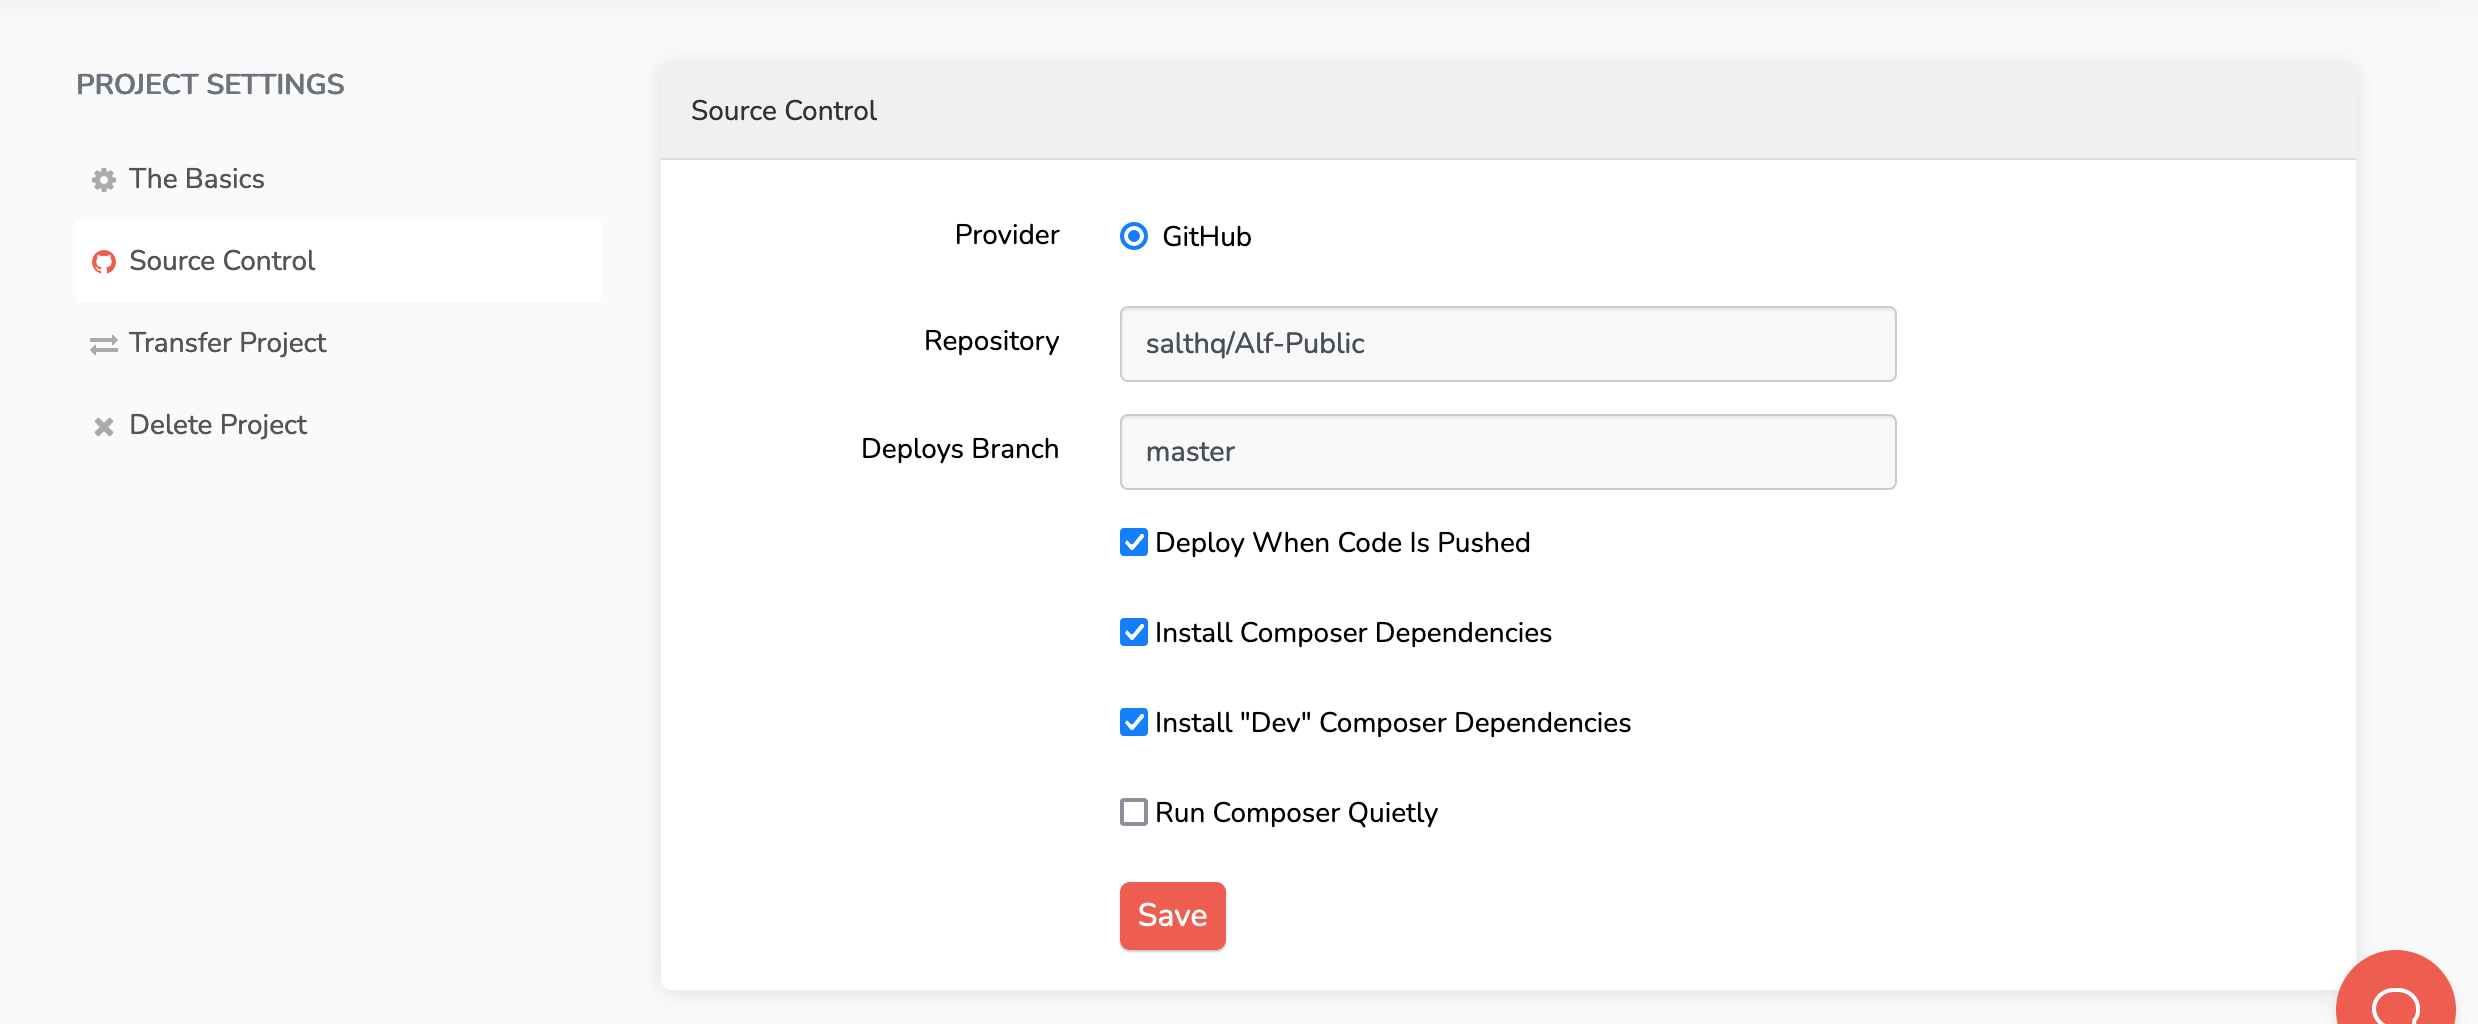
Create new project
- Navigate to Envoyer
- Create new project
- Fill in the details
- Add your URL to the healthcheck URL
Add server
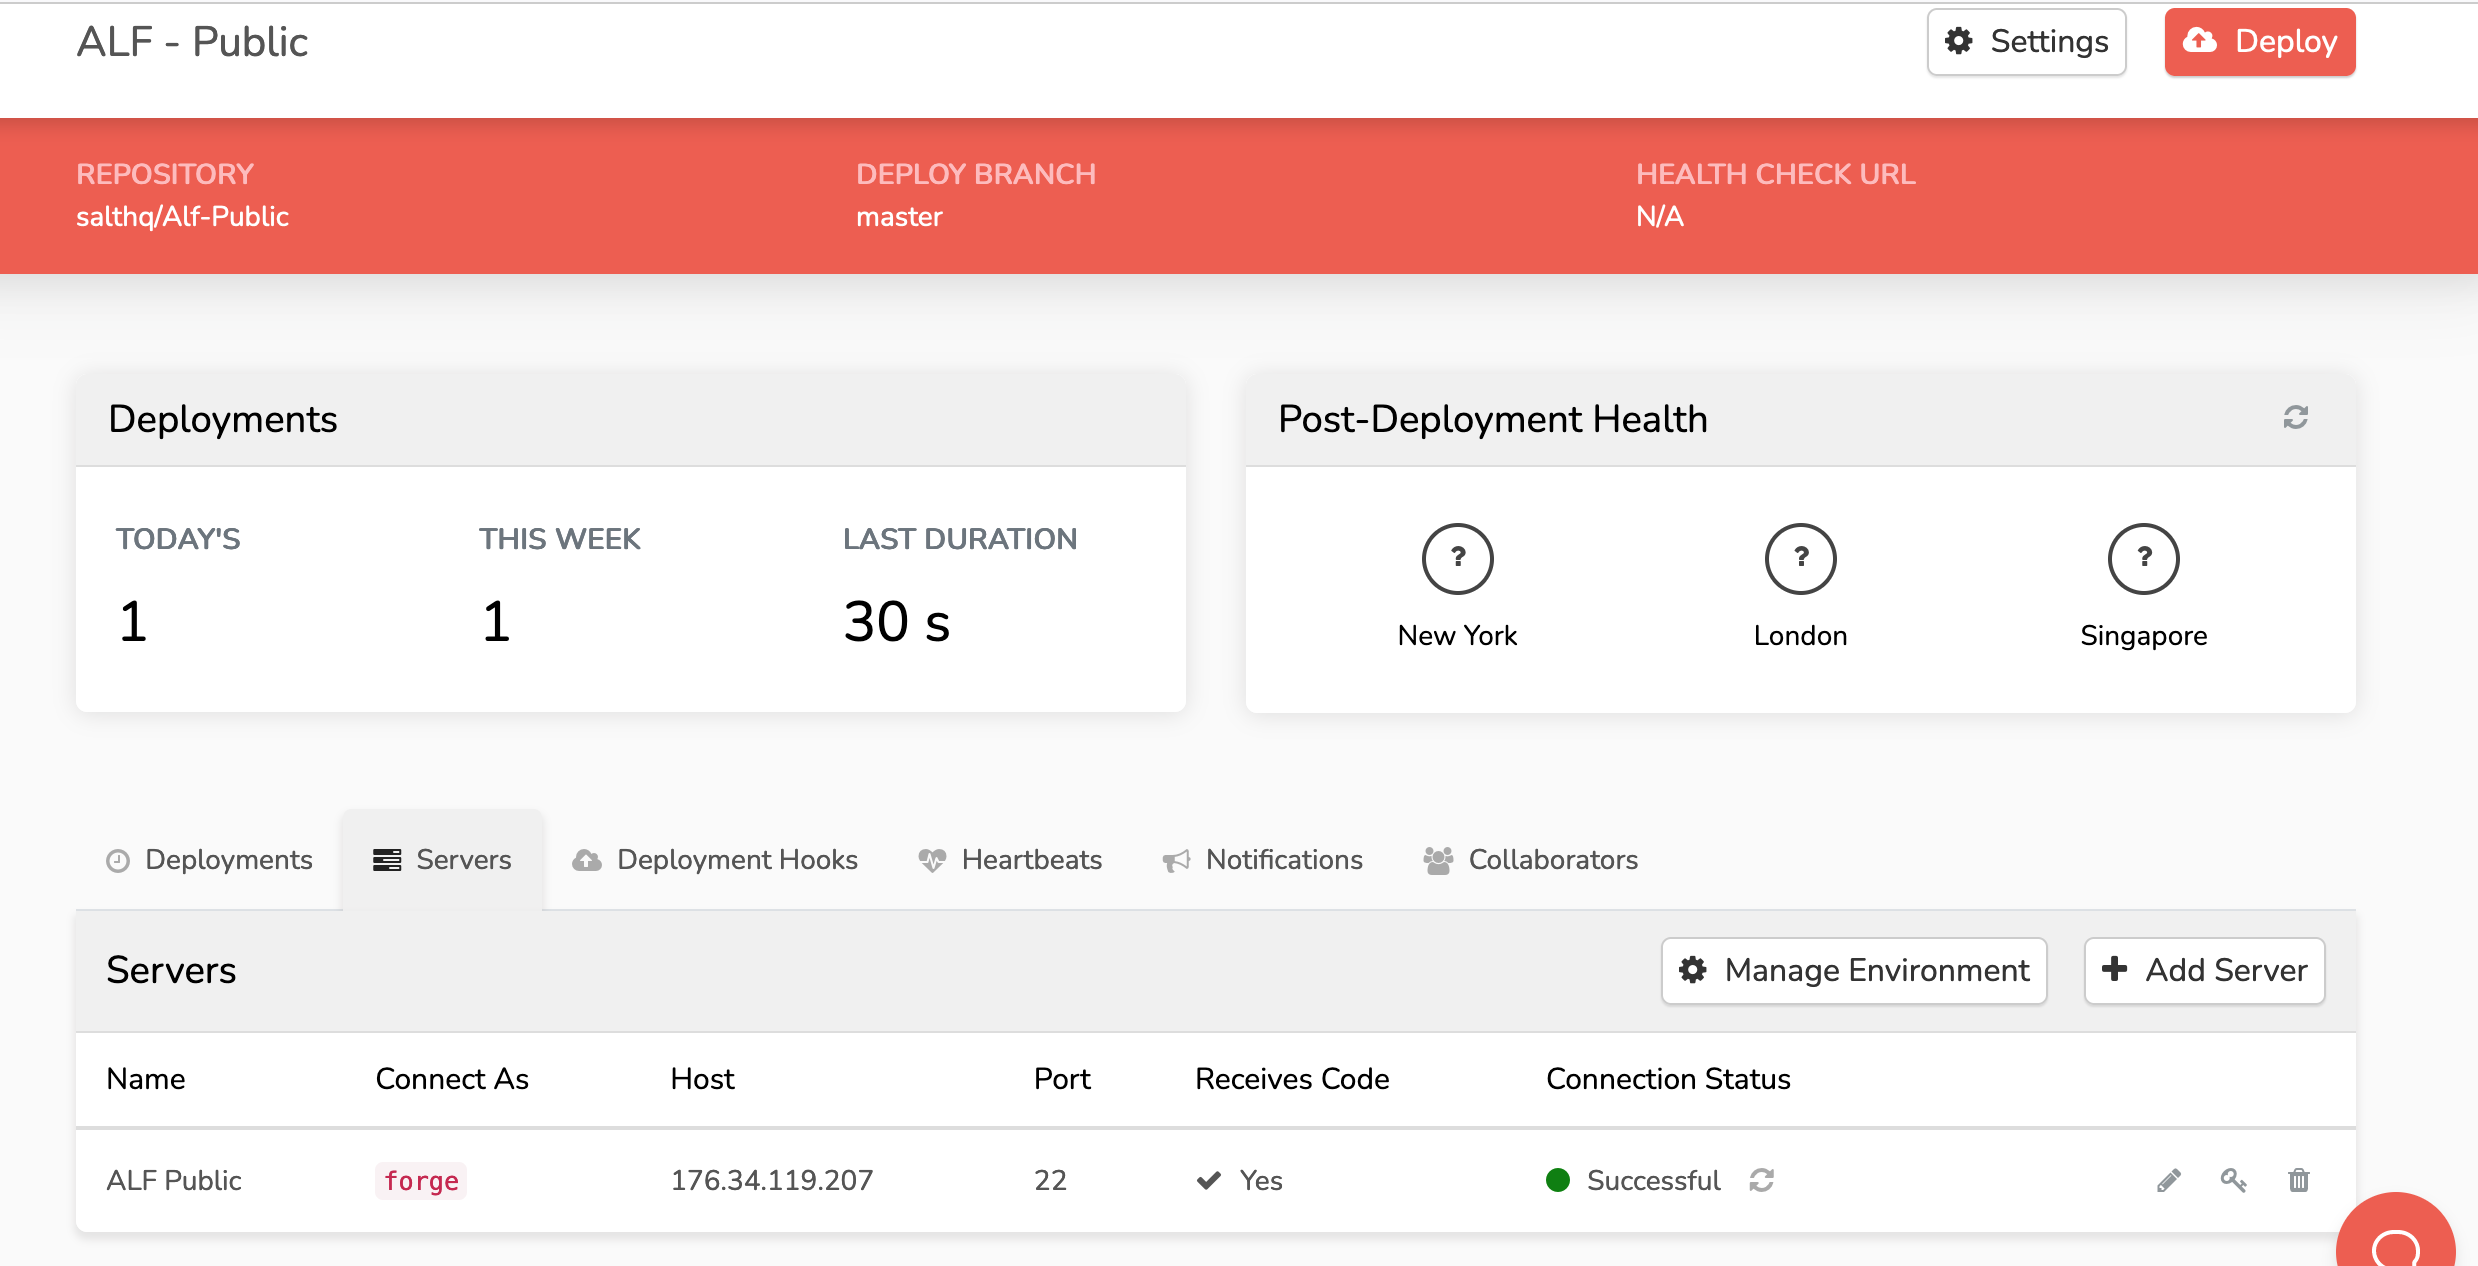
Go back to the project dashboard for your project, go to the server tab
Click Add Server button
Add server details, save
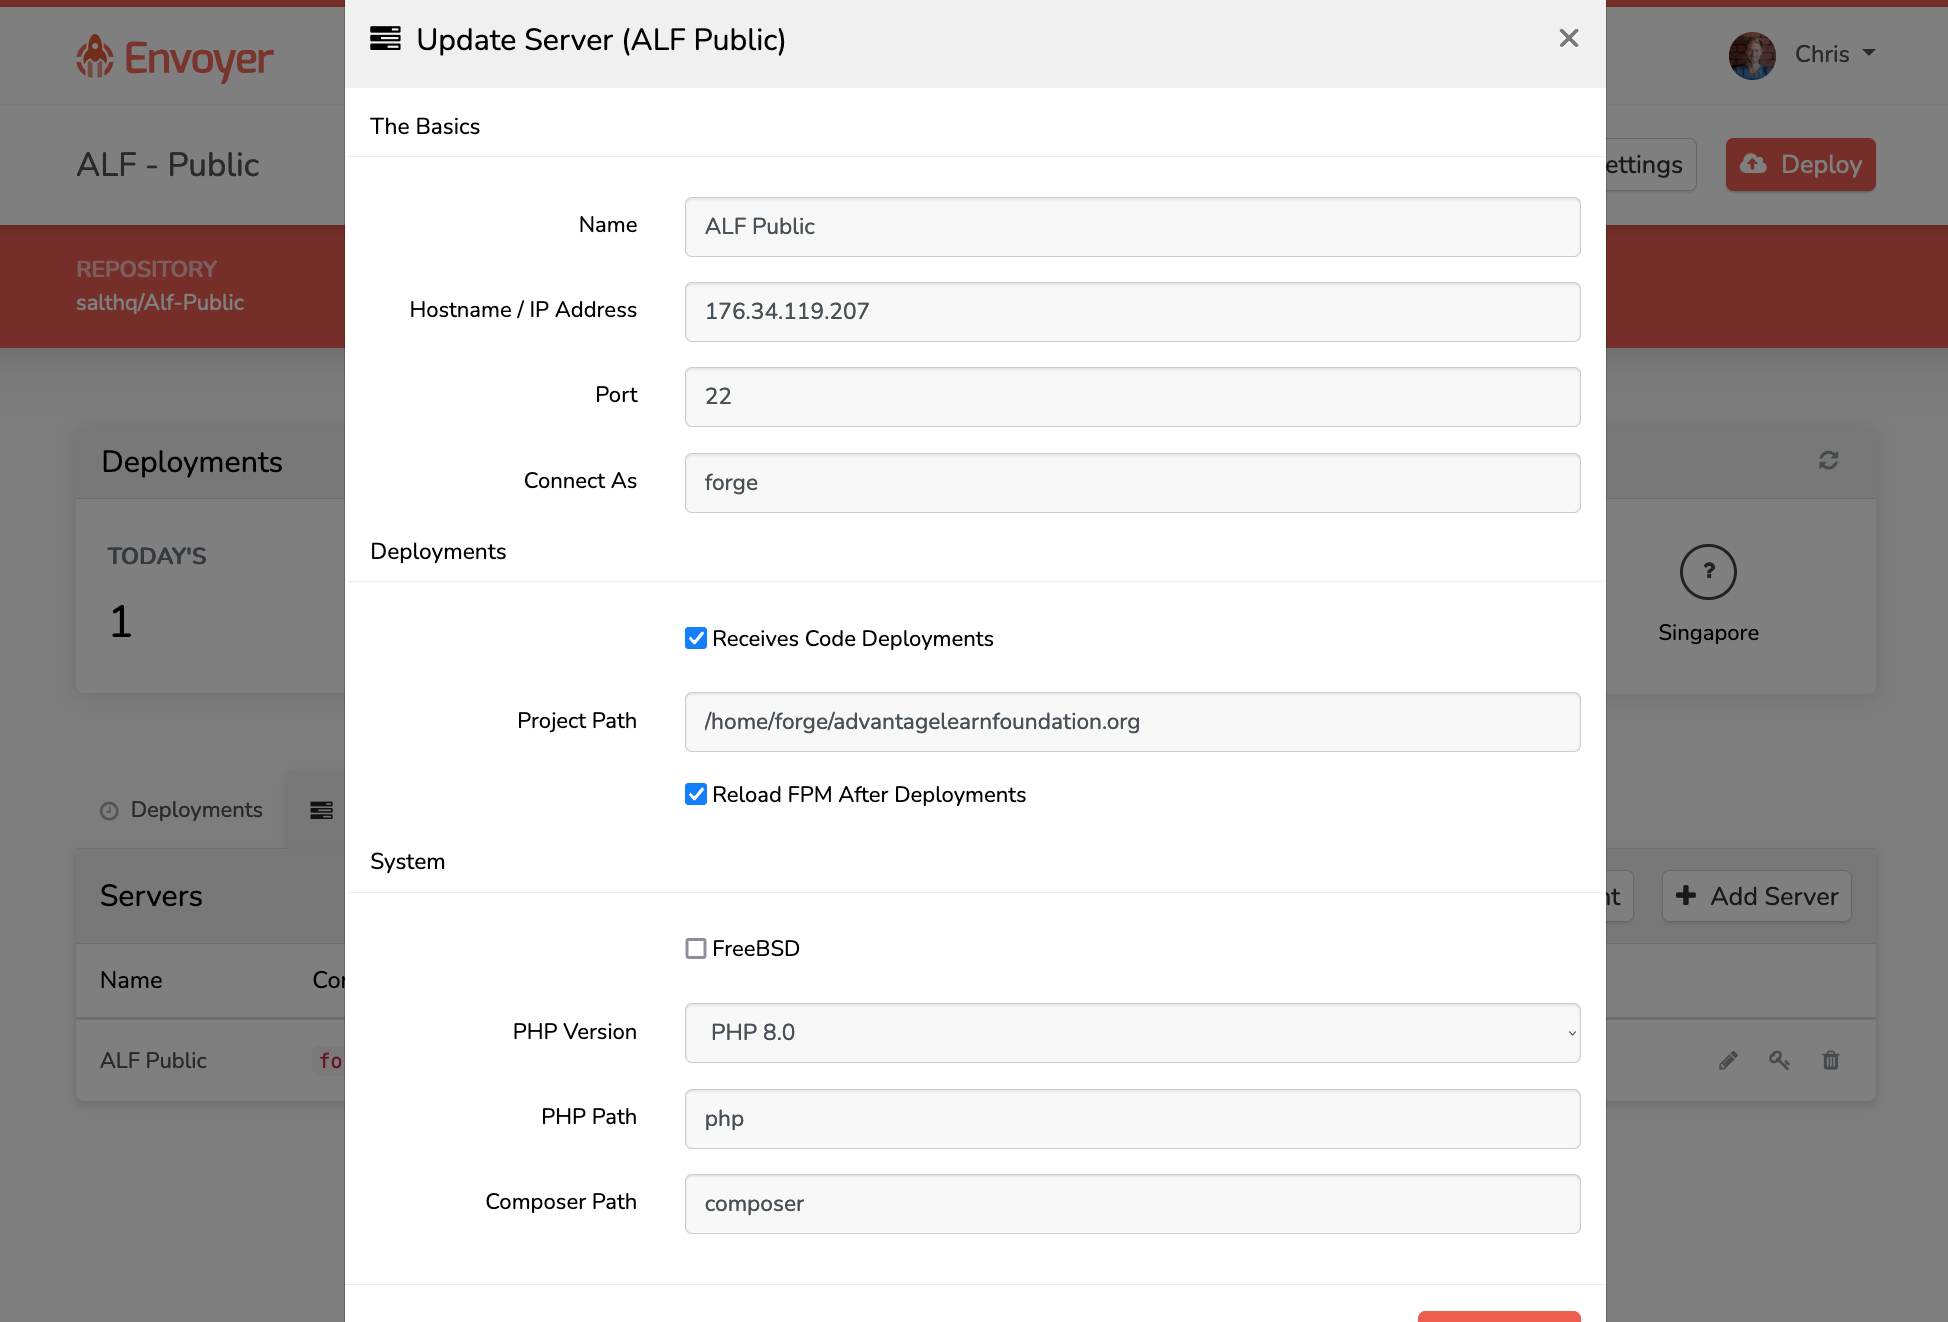
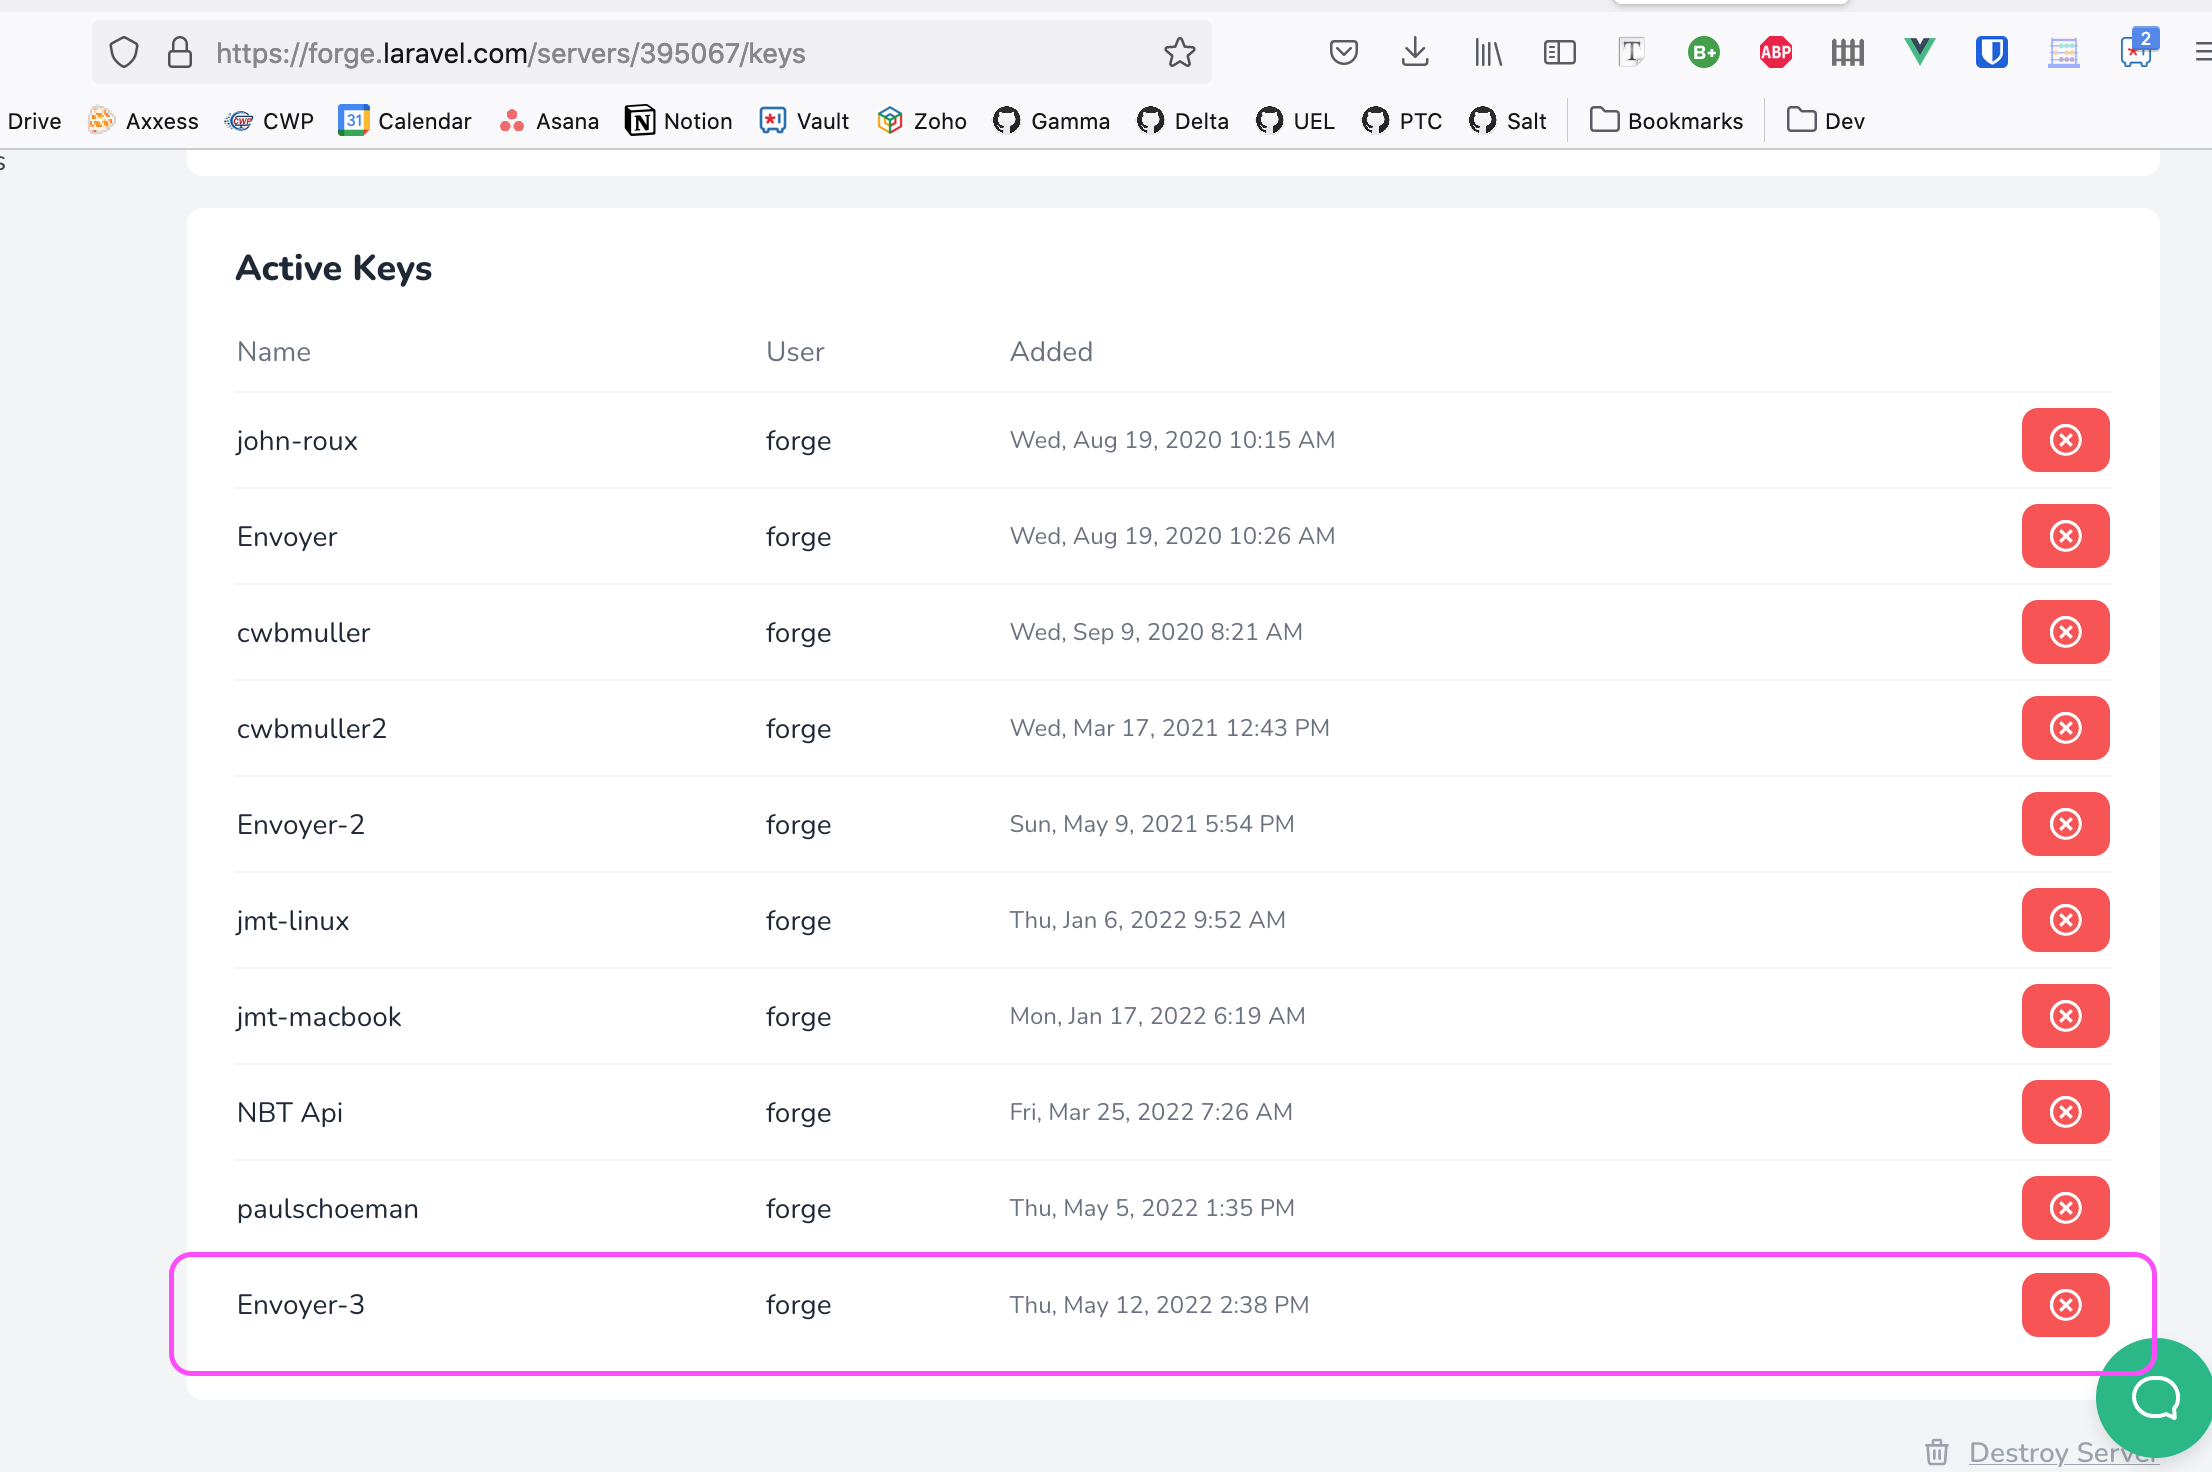
- Click Show SSH Key icon on right

- Copy the public key and add it to the Forge server's .ssh/authorized_keys file
- Connection Status Successful is what you’re after
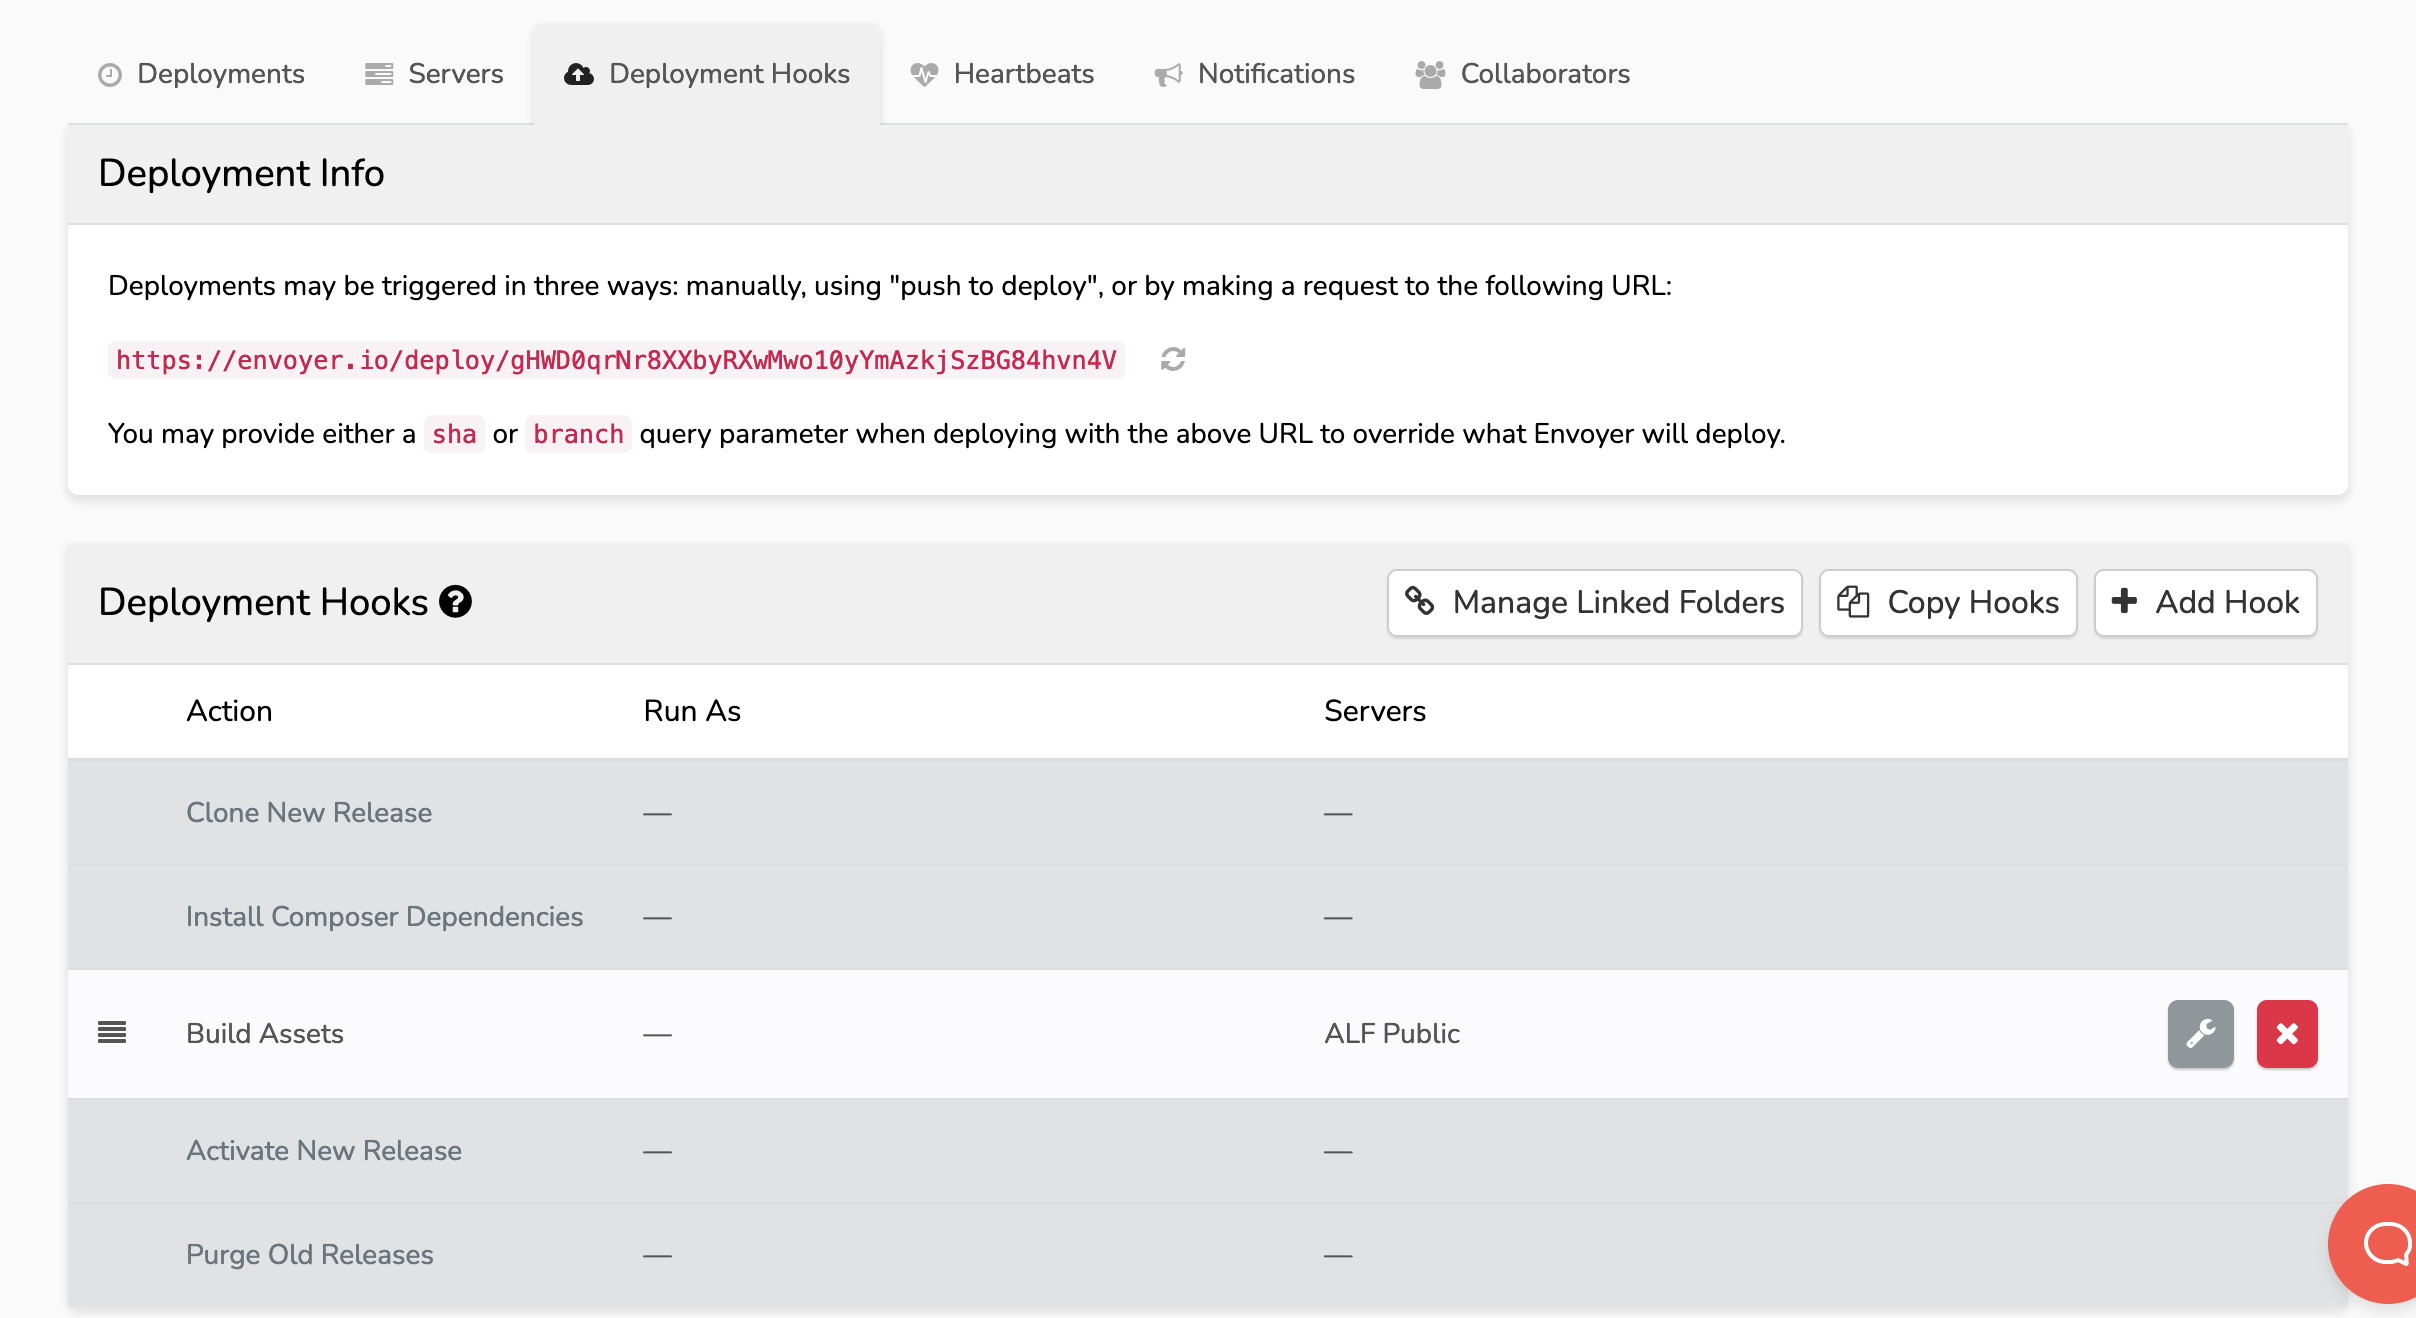
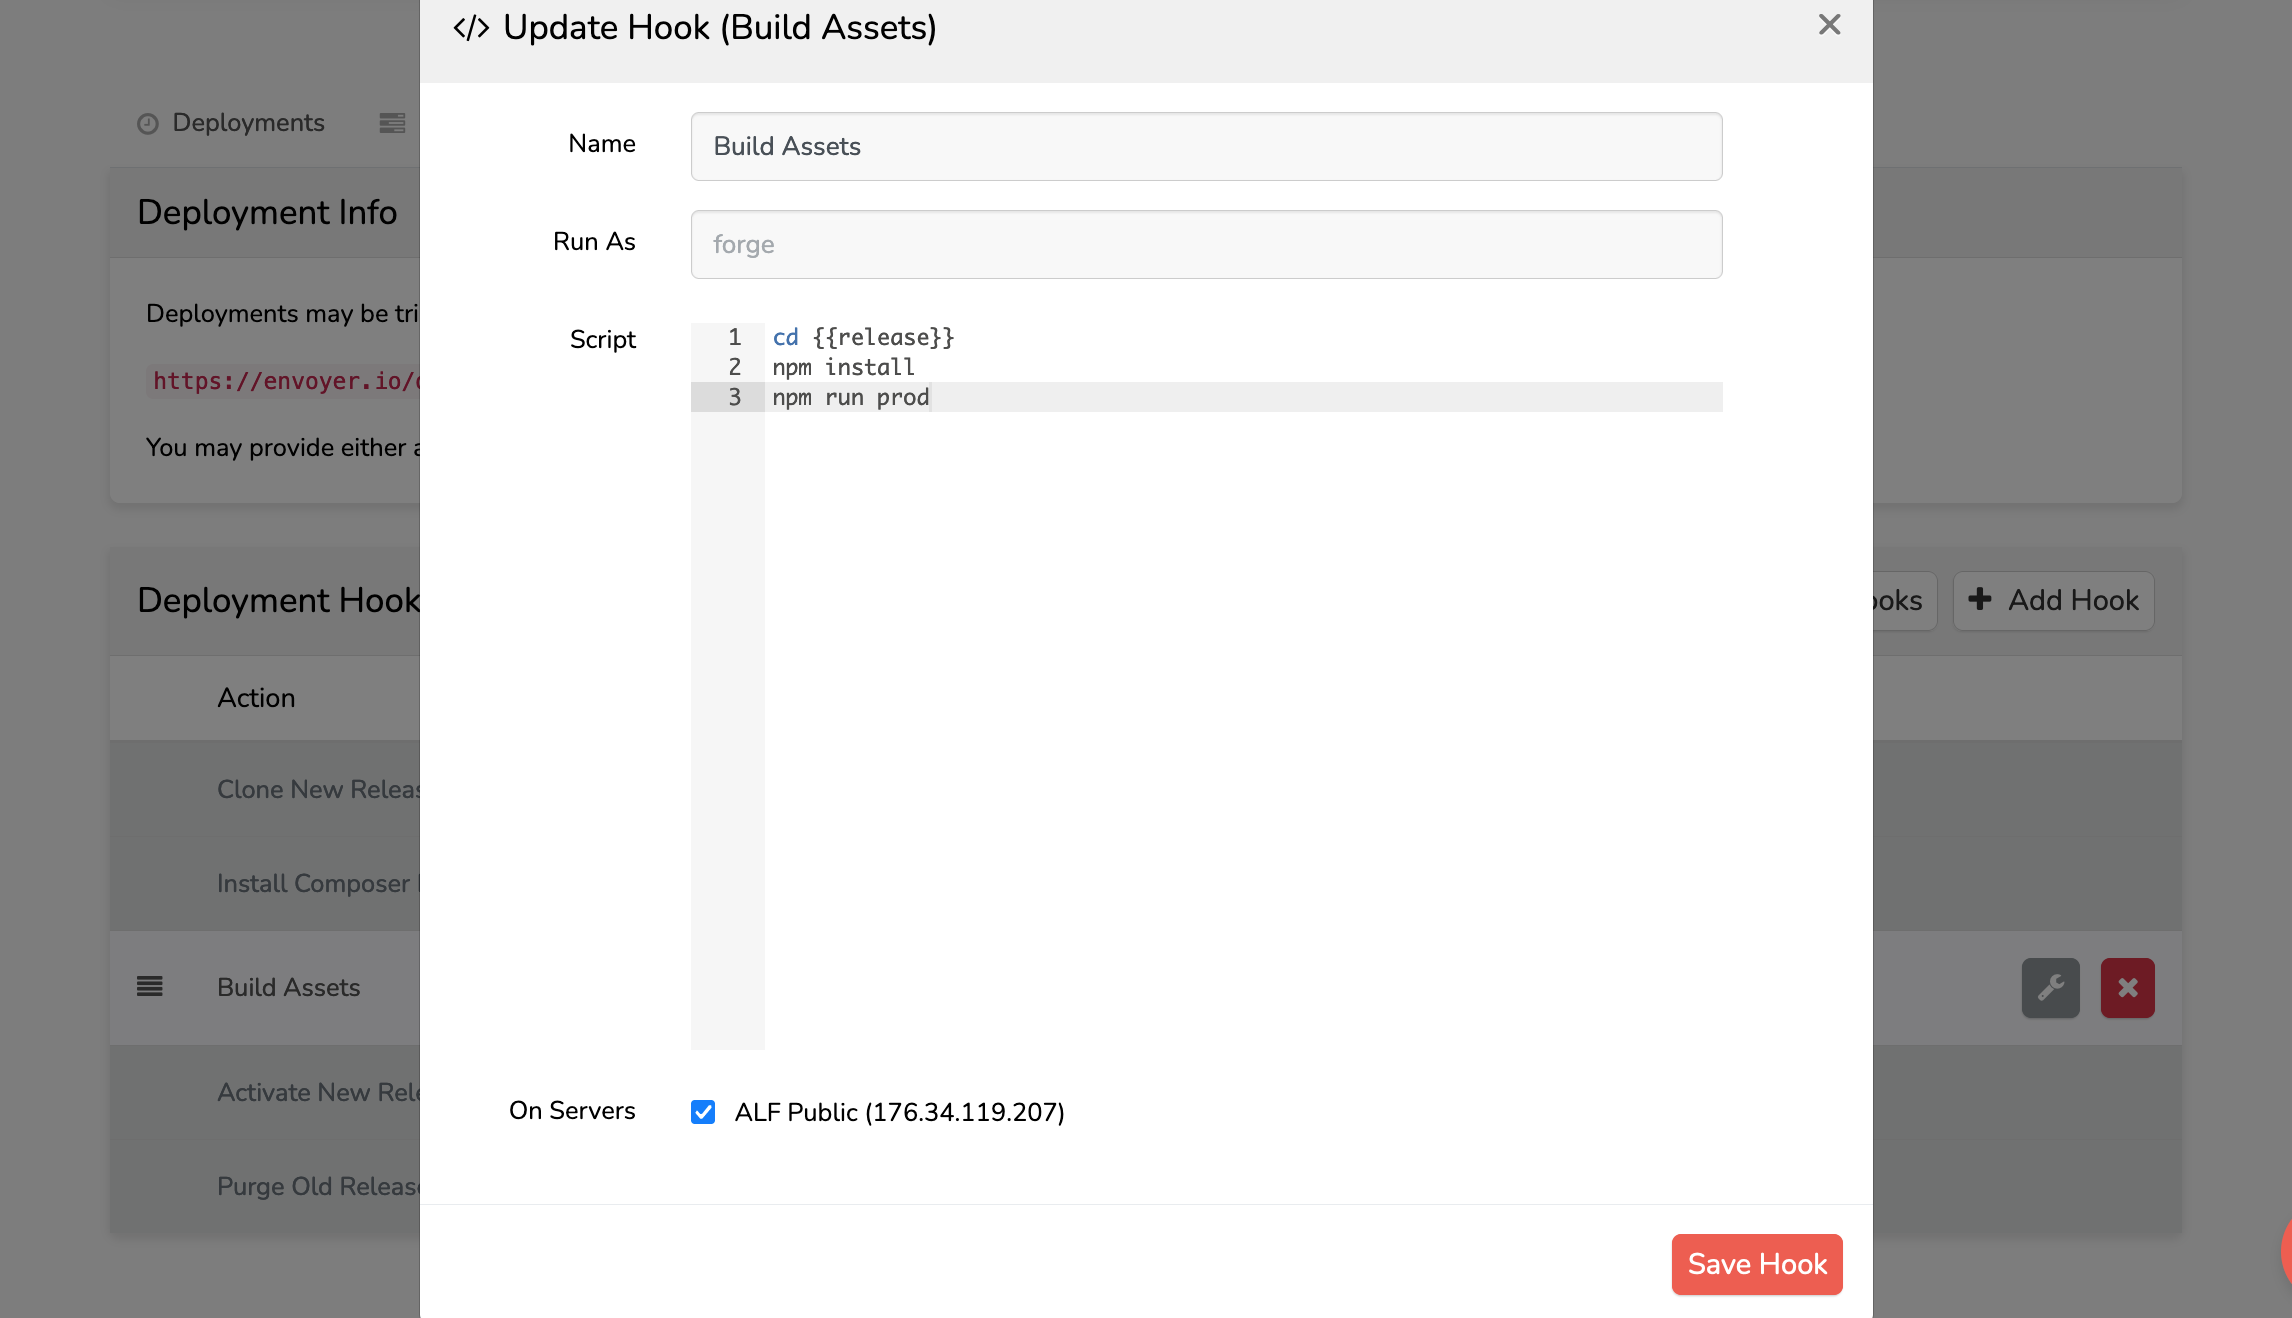
Add Build Assets deployment hook
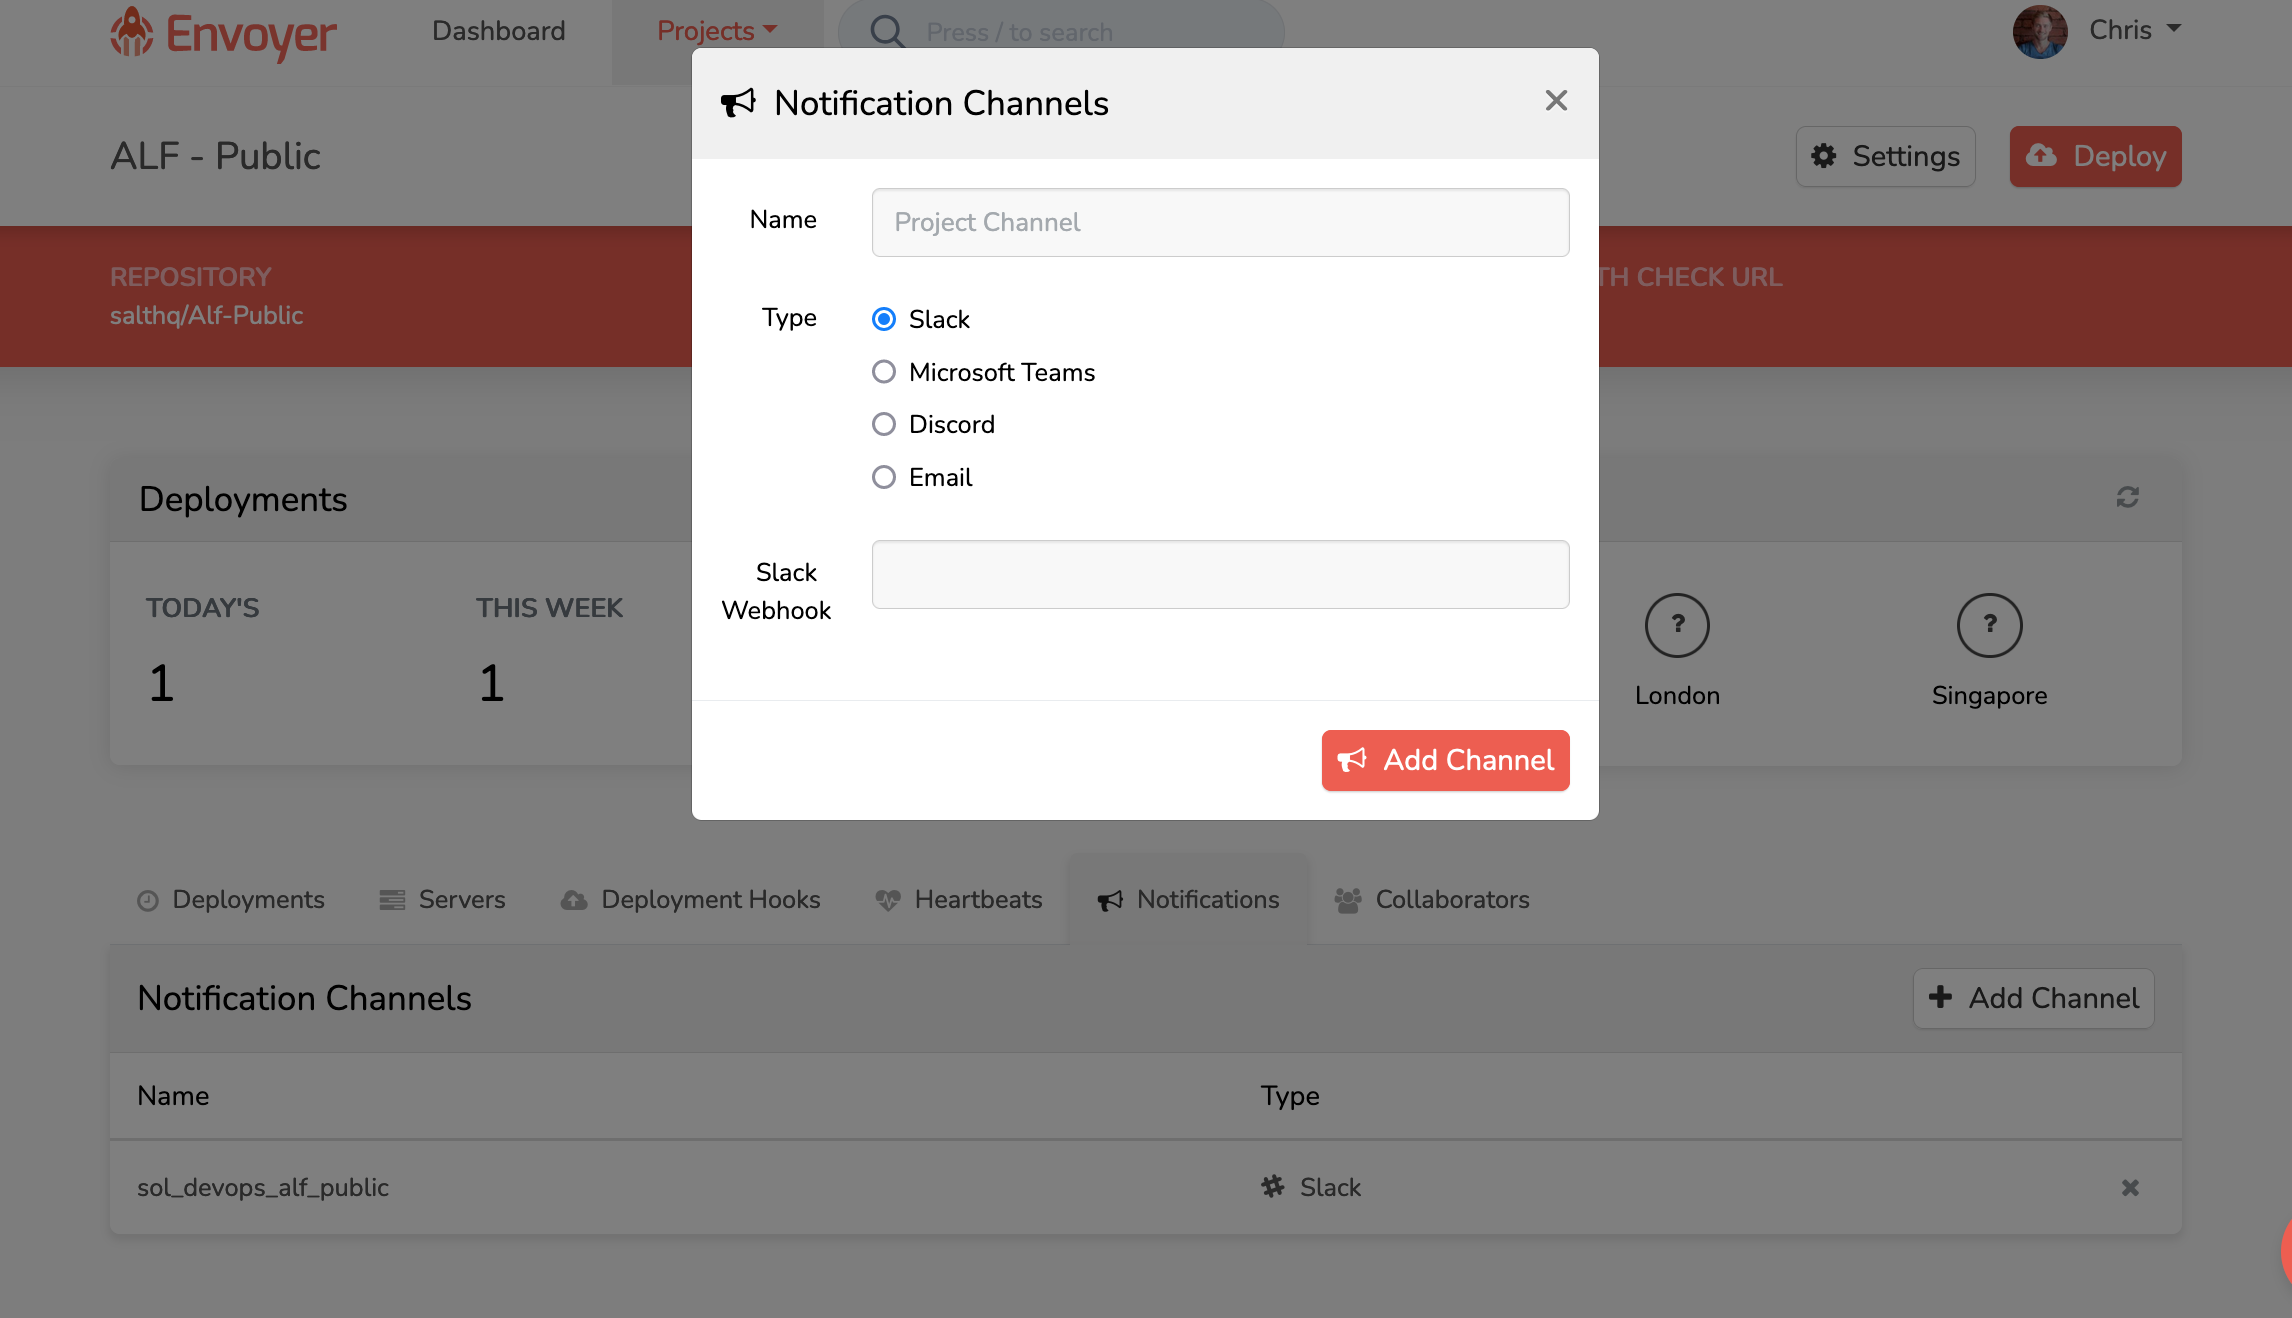
Add Slack notification channel
- Envoyer notifications typically go to the #sol_devops_envoyer_notifications channel
- A Slack admin will need to create you an incoming webhook in Slack (ask Paul or Chris)
Deploy
- Click big orange Deploy button in top right to do first deploy, all future deploys will happen automatically on commits to master branch of the remote repo
Access server via SSH
- In your terminal SSH in to the server
jsx
ssh forge@34.248.142.128- Go to site directory (you should be in home/forge on first load)
jsx
cd / home / forge / { domain } / currentAdd the .env
In the /home/forge/{domain}/current directory, create your
.envfrom the.env.examplejsxcp.env.example.envRun the Craft setup helper to populate the
.envwith the database detailsjsxphp craft setupAccess your .env file after setup using
nano .envand copy the contents of the fileThe .env actually needs to sit in Envoyer, it will be deployed from there each time. If you don't copy your env file to Envoyer it will get wiped when Envoyer pulls the latest changes from Github to the Server
Go back to Envoyer
Servers tab
Click Manage Environment button - get the environment key from Vault
Copy the .env values from above and paste into the field here in Envoyer
Add any other environment variables needed - check an existing Craft production env, likely candidates:
- Make sure the environment is set to production
- S3 bucket variables
- Mail configuration variables (Mandrill etc.)
- Auth0 variables
Update asset indexes
- If you used an S3 bucket for the image hosting then you need to update the Craft asset indexes
- Navigate to Utilities —> Asset Indexes
- Click Update asset indexes button

Granting a Craft CMS site access to an S3 bucket for media storage
Step 1: Create the bucket
- Navigate to https://s3.console.aws.amazon.com/ and click ‘Create bucket’
- Name the bucket appropriately and ensure its in the eu-west-1 region
- In the Object Ownership section, set ACLs to be enabled
- Turn off ‘block all public access’ and tick the box acknowledging the risk of doing so. The assets that are meant to be placed in these buckets are generally images and other media so they need to be publicly accessible. This document does not apply when creating private buckets with sensitive data.
- Leave the rest of the options as-is, scroll down and click ‘Create bucket’
Step 2: Create access policy
- Navigate to the IAM console and click on ‘policies’ from the left-hand side menu
- Click ‘create policy’
- Click on JSON editor and paste in the following. Replace
BUCKET-NAMEwith the name of the bucket you have created
php
{
    "Version": "2012-10-17",
    "Statement": [
        {
            "Effect": "Allow",
            "Action": [
                "s3:ListAllMyBuckets"
            ],
            "Resource": "*"
        },
        {
            "Effect": "Allow",
            "Action": [
                "s3:GetBucketLocation",
                "s3:ListBucket",
                "s3:PutObject",
                "s3:GetObject",
                "s3:DeleteObject",
                "s3:GetObjectAcl",
                "s3:PutObjectAcl"
            ],
            "Resource": [
                "arn:aws:s3:::BUCKET-NAME/*"
            ]
        },
        {
            "Effect": "Allow",
            "Action": [
                "s3:GetBucketLocation",
                "s3:ListBucket"
            ],
            "Resource": [
                "arn:aws:s3:::BUCKET-NAME"
            ]
        }
    ]
}- Click on ‘Next: Tags’. Nothing to add here unless you want some kind of tagging in place
- Click on ‘Next: Review’
- Give the policy a name and a description. We have been using Snake_Case naming, with capital letters for each word - e.g
Salt_Public_S3_Access - Click ‘Create policy’
Step 3: Create user and attach policy
- From the IAM console click on ‘Users’ in the left-hand side menu
- Click ‘Add users’
- Give the user a name. If its only used for access to the bucket, give it the same name as the bucket
- Select ‘Access key’ as the AWS credential type
- Click Next:Permissions
- Select the ‘Attach existing policies directly’ option
- Find the policy you created in step 2 and select it
- Click on ‘Next: Tags’. Nothing to add here unless you want some kind of tagging in place
- Click on ‘Next: review’. Ensure that the username, access type and managed policy are correct.
- Click on create user
Step 4: Add key and secret to Craft CMS .env file
After you have created the user, you will be shown the access key ID and secret key. These need to be added in the .env file of your craft CMS site repo. Generally the key and secret are labelled like this:
php
AWS_ACCESS_KEY_ID=
AWS_SECRET_ACCESS_KEY=
Add in the values from the screen on AWS and you should be able to access the S3 bucket from the Craft dashboard.